Hi guys!
If anyone was curious about my skin-care regime, I thought I would post it. I'm not sure if I look dramatically young for my age (25), but I have had coworkers who are around 18 tell me they thought I was their age and I have had people say I look young for my age, so I figured I would share what I do and see if it helps anyone else.
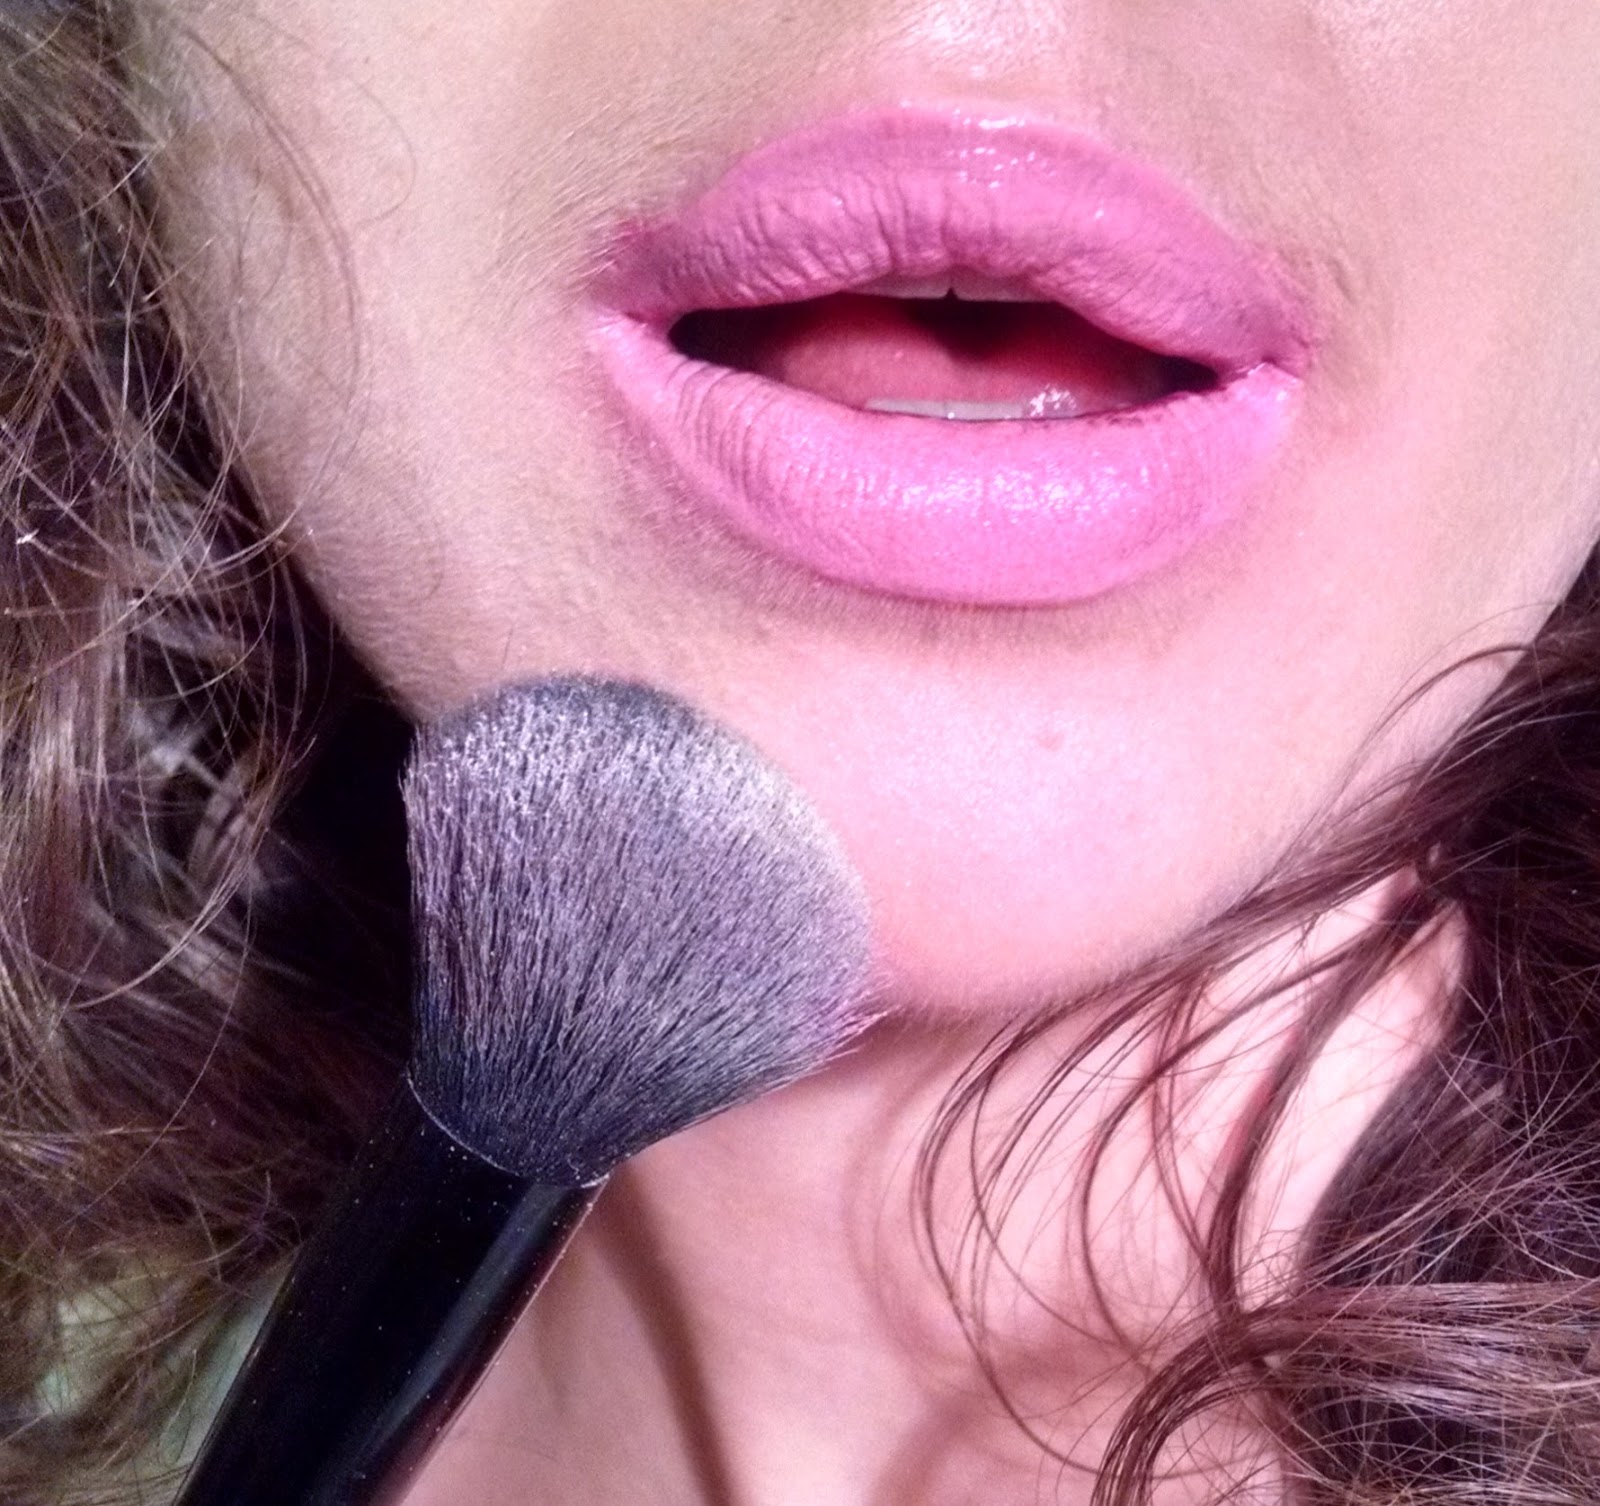
Here's a recent high-def photo of my face if you were curious, taken with my absolutely terrible cellphone camera (my nice camera got lost :( ). Yes I have kind of a mustache, sometimes I bleach it and sometimes I just wear it WELL, like in the photo. What can I say, I'm hairy I guess? Deal with it. I am wearing the Urban Decay electric palette on my eyes, and a Maybelline Matte Lipstick on my lips in the shade, Lust For Blush, with Urban Decay Perversion mascara. So, I don't know, I think I look my age, but my skin looks well-cared for, and that's mainly what I'm trying to demonstrate so you can feel a bit more comfortable with my advice. It's not to SHOW OFF. Or whatever. AGH! LOL. Anyway. It's not like I'd post a picture of myself that looks terrible on my own blog, although let me just say I take PLENTY of terrible pictures, like pretty much everyone else in the world.
So, to get going.
1) Daily Moisturizing. First of all, every day I moisturize. Every single day. Usually only once a day, at night time after I've washed my face, but I try to do it in the morning as well before I put on my makeup. I try to always moisturize AFTER washing my face unless I'm out and about doing touch-ups and it's the middle of the day, because if you moisturize before washing your face, it can be irritating and clog pores, especially if you still have makeup on or if you are oily. My holy grail skin-care product is the Burt's Bees Intense Hydration NIGHT (omg!! I wrote day. It's MOST DEFINITELY THE NIGHT VERSION. Sorry folks.) Moisturizer. It is just...my staple, my everything. It doesn't break me out, it doesn't enlarge my pores, and my skin feels so relieved and happy when I use it. I have been using it for a little over two years now. I also use it on my under-eyes if I don't have an eye cream and I'll often layer a thin layer of it under my eye cream. I concentrate it in all of the dryest areas on my face, which are as goes: my forehead, my under-eyes, and my smile lines. Everywhere else is pretty normal/combination, but I do put a thin layer of this on my cheeks and jawline about once every other day (I don't time it, just kind of ball-park it as needed...no crazy routine...I just look at and see how my skin feels and go from there) because they can be dryer as well. I also make sure to moisturize my neck. I prefer to use the Burts Bees for this as it works best, but often out of frugalness I will use creams that have made my face break out on my neck, which I don't like doing and I believe to be less effective because the skin is still SOMEWHAT intolerant to the product, but I feel is saving me some money.
(When I was younger, between the ages of 16-22, I used Clean and Clear moisturizers...mainly the one called morning glow, which had SPF in it, each morning, all over my face, a little more haph-hazardly than I do now-a-days, but with the same concept as I mentioned before, concentrating it in dryer areas. My forehead and chin were always breaking out at this time period, so I would moisturize them very sparingly, whether this helped or hurt. I almost never put moisturizer on at night-time during this time period, but when I did I used the same product. I was highly acne prone and sensitive to whatever few products I tried, and would usually just wash my face with regular tap-water. I am sensitive to ingredients, so I would often just rinse my face with the water, not wash off the small amount of makeup I had on, and wear hardly any makeup other than a bit of concealer on my under-eyes, lipstick/gloss, mascara and an inordinate amount of eyeliner as was my tradition especially between 18-22.) I would often re-use the makeup I put on the day before and just touch it up, because I was so worried about different ingredients from products disturbing my skin, as it was so sensitive at the time!!
2.) Portable Skin Care. I always bring a long a little moisturizing stick in my coat pocket or purse (I use ELF's Hydrating Stick. It's a clear formula and in a black tube that you can take apart when you are finished with it and use to store little things like tweezers, smaller lipsticks, and q-tips) when I'm out and about, especially during winter time, and I will dab my finger into it and put it on the dry areas of my face (under-eyes, smile-lines, and forehead). I find it also refreshes my makeup and helps with any creasing in places like the under-eye where makeup tends to cake up. I usually use this when I am ACTUALLY out and about, and if I'm home a lot I won't moisturize at all during the day and forget to use this at all, so I'm usually a lot better cared for when I'm busy, ironically, but I don't like worrying about this constantly. If it's nearby and I'm thinking about it, I use it. Naturally if I'm at home I'm not carrying around a purse or coat with it in it, so it's not nearby and I'm not going to be reaching for it all the time and losing it, as I am sure to do. I also have an ELF Hydrating Mist that I like to spray on to refresh that I really enjoy and I do think it benefits my skin-health as well, and I'm more likely to spray this on at home as the air can get dry especially in winter time, and since the bottle is slightly bigger and brighter I'm less likely to lose it (can you tell I'm good at losing things yet...I have to organize my routine around this tendency of mine).
3.) Eye Cream. Over the years I've used some really sub-par eye creams that I absolutely don't recommend and usually I've just used my typical everyday face cream on my under-eyes. I now currently have a Murad Eye Cream that I originally got as a sample but enjoyed so much I decided to buy the large (very expensive) version that I spent using the points program at my work, so I got it for free. Upon first few usages I noticed my fine lines decreased. I'm noticing this less now that I've been using it for a few months, however I still feel it is a great eye cream. I do like to double layer it with my Burts Bees often because I feel that gives me the best mix of hydration/benefits, as for some reason I personally feel this eyecream is not as heavy as I'd like it to be and seems to absorb really quickly into my skin, so to give it some longevity I love to layer it up especially at nighttime before bed, because in sleep I feel that's when my skin becomes dryest.
4.) Sunscreen. I started using sunscreen on my face most mornings (not every...maybe like 5 days a week, depending on how I feel) by age 23. At around age 20-21, I don't know if you guys noticed, but I had some sort of gap year where I hardly used ANY skin products at all except I wore natural sunscreens on my face every day. That year, I really, really worked on my diet alone and did some sort of cleanse. Nowadays, I strongly prefer a balanced whole foods diet with my fair share of yummy junk, and a balanced skin-care routine to top it. I like to put on a Neutrogena (I don't know why but I just feel this brand has always worked the best and improved the health of my skin and even my pores the best) sunscreen each morning before makeup. I LOVE Neutrogena sunscreen!!!!! It is wonderful and I don't know what I'd do without it and I hate to be advertising for such a mass brand, but I just love how it evens out and brightens my skin and it seems to help with fine lines and even my pores, but longer than a regular primer does. I originally started with the Neutrogena Age Shield Face SPF 110--but found it stung my eyes more than the one I currently use, which is the Neutrogena Dry Touch SPF 55 (it's not even marketed toward faces but I swear I like it far better, and the difference between SPF 55 and 110 is actually less than .001 %...). I have used other sunscreens inbetween all of this time but these are the two that bar-none, I just like the best. You can't wear them well in water though!!!!!!!! I've tried many times in all kinds of makeup, trying to find a good combination of products and applications and hoping to succeed--but simply hasn't worked. I'm still looking for a good water-proof sunscreen that I can wear under makeup (and just in general for that matter...so far I've just worn these Neutrogenas and other things and got my eyes stung and beared it--awful and I really need to just buckle down and find one!)!!! I can definitely wear a water-proof makeup look that kicks ass, but it's always been at the sacrifice of sunscreen and I'd MUCH rather have on a good sunscreen than fabulous makeup when I'm out swimming because my face will burn, especially my nose. I wear face sunscreens all year, winter or summer...body sunscreen usually only in summer, which I know I need to improve upon but I'm not as motivated to in Winter because I'm inside so much more!
Another thing I'd like to buy is an SPF powder for
sun-protection over my makeup when I'm out and about in the summer-time,
and an SPF spray for winter! :) I think those could be really helpful
little essentials for easy over-makeup sun-protection!
5.) How I Use Makeup. For years, I didn't even use foundations because I believed they broke my skin out, aged it, and enlarged my pores, and I still believe this to be the case to this day, however I wear foundation more now, as I feel it looks nicer. I've tried MANY types of foundations and they all pretty much do the same harms to my skin, some more than others but with little variation. I use it sparingly, starting in the center of the face (nose and undereyes, where the redness, blackheads, and darkness is) and working outward, using the most concentrated amount of foundation in the center of the face and least amount toward the outward part, where I need the least and seem to get irritated by it the most as well for some reason. The center of my face doesn't seem to react much to foundation so I'm fine putting it there as I feel it helps more than hurts.
6.) Hygiene. I am not 22 anymore (like 25 is so much older, but whatever) and I do like to wear foundation more now because I am less irritated and less sensitive to it than I was in the past, and I think it looks nicer (it also would have looked nicer in the past but I couldn't risk all the irritation I got). This means I HAVE to wash it off, it is definitely the MOST irritating product to my skin, be it a powder or a liquid foundation. I try to wash my makeup off every day but honestly, I don't always make it because I'm borderline narcoleptic at night-time and sometimes if I just lay down I'm asleep before I'm even realize it and before I even have time to drag myself to the bathroom. However if that happens I make sure to wash it first thing in the morning (unless I'm feeling lazy and I end up washing it at 2pm on a weekend day!). I like to wash it off with Burt's Bees Radiance cleanser...I've found this'll take off even waterproof mascaras very well, in my experience and with the ones I've used. It just is a very quick way to take off all my makeup with as little scrubbing as possible. I try very hard not to touch my skin and move it around much. Lately as I am working at a job that requires me to wear makeup during every shift, I have been using Micellar Waters, particularly the one by Marcelle, which is a Canadian brand. It's nice to have because if I'm super tired after an evening shift and I'm lying down and can't bring myself to move, I'll just keep it near my bed and pour some on a cotton pad and it removes my makeup rather quickly and leaves my skin feeling smooth. I strongly prefer to rinse and wash my face after using this product, in spite of the fact that it seems to leave no residue on the skin, I feel the look and health of my skin seems to be better if I wash my face after using this product--but it's better to have this product and use it than not wash my face at all, which is the worst situation of all.
7.) Random Products That I Also Enjoy Benefits From:
All of the ones below are products I tried for the first time in the last year or so.
I use a hyaluronic acid and vitamin C product by Palmetto Derma that I absolutely love. It seems to even out my skin very well, tighten it, and plump it up, but it's drying so I only use it a couple times a week at most. I got it in my Boxy Charm subscription before I canceled it a while ago, and it's the product I'm most gleefully happy about and will continue to buy in some format (at least for that acid and the vitamin C) for the rest of my life.
I use Witch Hazel often, at least a few times a week, sometimes twice a day that I buy for super cheap from the grocery store in the health department. It's by Dickinson. It cleans up my skin really nicely and is a nice intermediate sub between the Marcelle cleansing water, but I don't like to use it ALL the time because it has alcohol in it, which is bad for my dryness in my skin.
I have other random products, samples I get in beauty bags and with makeup orders, that I'll throw on my neck or undereyes or whatever. Sometimes I feel they help more than they hurt so I just try to stick them on my neck or hands as I'm irritated by a lot and usually what happens is my pores enlarge and get clogged and then they're permanently enlarged after that (looks like a scar usually!) so I am VERY careful about this.
I have a few random mask products--one by Mario Bedescu and a couple very basic powder clays. I use all of these very sparingly.
The next product I want to try to buy is a hydrating mask since I have dry skin...I learned about them from a Lisa Eldridge youtube video and I think they sound divine for my skin-type. I'd like to try the one by Dermalogica.
My philosophy is that once I find a product that works for me, I STICK THE HELL WITH IT because my skin is irritated by so much that it's really not worth it to try new things and mess it up more.
So guys as you can see here, the main points I have are:
I have many times sacrificed beauty for my skin-health. I've also had to do it for my eye-health as well...One year (age 22) I had an awful eye infection for some reason beyond explanation, and I stopped wearing makeup for the entire year, wearing it only on special occasions. I think you can see here that ultimately, I do what I want to do whilst still maintaining happiness and sanity and sometimes I get lazy and I'm fine with that.
Reading it all, it seems very complicated but it's actually very simple...I have a simple daily routine and I do whichever parts of it that I feel like, when I feel like it, trying to do at least 3 of the 7 things in it each day. I seldom do all 6 every day, but some weeks it happens.
So that's it... I try to keep it easy and under 20 minutes a day, even doing all 7 steps it should never take more than 30 minutes otherwise I feel like I'm wasting my life away! I also try to keep the products all at as low of a cost as I can because I don't also want to spend all my money on skin-care...so a lot of these are drug-store brand and drug-store priced, most importantly the three products I use the most which are the moisturizer, cleanser, and sunscreen.
Take care and hope this helped. Long-winded and seems so complicated, and if I did all of these steps every day (I tried to in the past and I was miserable) IT WOULD BE. But I try to keep a balance and my main thing is to keep hygienic, keep moisturized, and keep sunscreened, and not worry as much about the rest...just add it in where I can!!
Ideas, tutorials, and explanations on how makeup and skincare work together to create cohesive, long-wearing looks.
Translate
Friday, March 13, 2015
Monday, January 12, 2015
My Most Favorite Foundation Brushes :)
As a forward, sorry the pictures on this blog are subpar. I used to have an excellent, expensive digital camera, one I was totally in love with and completely satisfied with. It disappeared... so here's what I've got! :) Also, only the Tarte brush is currently clean ;) These get used a lot and I'm not one to clean my brushes just for a blog entry. I think you understand!
Foundation isn't something that I have always worn. Back in the day, I fervently believed that foundation, of all makeup, was the worst for your skin, probably from just grabbing the first drugstore foundations with cute packaging I saw, not washing my face beforehand, and promptly breaking out from them. (ALWAYS have a clean face before applying foundation).
I still do believe that not all foundations are created equal, and I don't wear foundation every time I wear makeup personally, but that's an entirely different topic all together. The weather can completely affect what your skin is doing and what foundations you use, because dry climates can dry out the skin, and humid/hot ones can make it become more oily. Plus hormones, and food allergies. Your skin is a piece of work :) So clean these brushes as often as you need to, keep your face clean, and choose the right products for you... And hopefully what I write here can help you navigate that a little bit. Or if you just like brushes as much as I do, come on and lets get to the brushes!
So I have several foundation brushes that I rotate depending on what foundation I want to use and what mood I am in. And these three, all-encompassingly, are the most fantastic of the bunch. I ADORE these.
Qualities I Seek From A Fantastic Foundation Brush:
1. This is the most base (no pun intended) requirement, but sturdiness. Your foundation brush has to do more blending than all of your other brushes. It better not feel like it's falling off the handle. And this is no time to have ANY bristles falling out. If all of your other brushes are sub-par, fine, as long as your foundation brush is quality.
2. Blurring effect. I don't want any streaks when I put on my foundation. My foundation should look soft, blended, and impeccable, and brush streaks anywhere on the face mean that the brush isn't doing it's job correctly. The brushes I am recommending here, astonishingly, do not leave any brush marks.
3. Softness. I don't want a coarse brush scratching against my face. The application should feel luxurious and smooth, I don't want to worry about over-exfoliating my face while I'm doing my foundation.
4. Low product absorption. I don't buy foundation so half of the product I apply can be absorbed into my brush. These brushes perform to blend the foundation into my face, and if any foundation is absorbed into the brush, they still do such a quick, even application that I use far less product than I would have, had I used my fingers to apply the same product.
All of these brushes have these qualities, but a couple of the brushes have some more than others. I'll explain why each of these are great for different densities of foundations, which qualities of each brush will apply to which foundations, and how the brushes perform on the face. These are in order from my most favorite to least favorite. So without further ado, here they are :)
1. The IT Cosmetics Velvet Luxe LBD Foundation Brush #302. Sigh... I can't stop touching this brush. This is by far the softest foundation brush I have ever touched, even softer than the much-touted Makeup Forever artisan brush line (of which, does not blend well at all, I've found, for some strange reason, and I promptly returned it). It blends pretty much any foundation like a dream. It feels wonderful against the skin because it literally is so velvety soft. And best of all, I don't know why, I don't know how...but it absorbs no product. This is a rave review here, honestly. I can go much longer (than I probably even should) between washings with this brush because it seriously absorbs barely any product, making the brush save me money because I have to spend less on foundation due to the fact that I'm using far less. This is wonderful. If I had to get rid of all of my makeup brushes and could only keep one, I would keep this brush. It is my ideal foundation brush. I really haven't found a liquid foundation yet that it doesn't apply to the skin fantastically. Unpictured, it even has a little rhinestone at the bottom of the brush, which is a cute touch (one I don't really care about, as the brush is already so fantastic). I love using this brush with every foundation I own, but I prefer to use the bdellium for the thicker foundations because it seems like it's bristles would be hardier with those, though this one does still blend thick foundations like a dream and it's also easier to blend with this brush because it's so soft and fits better into the nooks and crannies of the face. You only have to touch this brush to unblended points of the face, lightly press, to blend, and by buffing you move everything quickly into a beautiful place because it's so soft and round. I would hardly ever say this about anything makeup related, but this brush is worth every penny of $38. They can be purchased at Ulta only, at this point in time.
2. Bdellium Tools 957 Brush. This brush is excellent at applying thicker foundations like Kat Von D and all medium thickness foundations. It just completely splays out the foundation everywhere on the face and it is such a soft, teddy-bear feeling kind of a brush, unlike the Velvet Luxe which is more silky soft. I love the feeling of this brush ALMOST as much as the previous brush and I would not want to do without this brush in my collection because it is so uniquely warm and soft feeling. Pillowy. I do not recommend this brush for thin watery foundations because it will absorb more product, but even then it should still blend absolutely gorgeously. I love the way this brush blends and buffs product into my skin. I use a swiping, circular motion. You do have to pat it ever so slightly more than the velvet luxe to get a beautiful blend and it is larger so it doesn't fit on the face as well, but no matter. It is also fluffier and less dense, which could be a good thing. Beautiful, soft application, no streaks, easy to apply. I adore it. I got mine on Amazon for $12. The price seems to fluctuate, right now it's actually $11.26, but I've also seen it go up to $14. Here is the link to specifically where I bought it. That is absurdly cheap for a foundation brush that is this effective. There are other colors, I just adore the pink one. And I couldn't tell ya whether the other colors are any different... I'm thinking that the yellow and green are probably the same but I'd be weary about the one with the brown bristles. ALSO, you do have to wash this brush more than the other two brushes listed, as it absorbs more foundation and the bristles clump together far quicker. Clean foundation brushes mean a better application.
3. Here is where things get different. This is the Tarte The Balancing Act Bamboo Foundation Brush. I LOVE this brush for extremely thin, liquidy foundations because it absorbs absolutely no product, something that's harder to achieve with thicker, softer brushes (although the Velvet Luxe would probably do it fantastically too). It is also SO EASY to fit this brush into all the nooks and crannies of the face, and since thin foundations are hard to target directly in certain areas, this brush is the ticket to having those foundations give you the coverage you are looking for in those areas because it picks up and applies those products to just where you want them, without blending them out into the rest of the face and into blended-into-nothingness. You know, when you're like, "Wait, did I even put foundation on? What gives?!" And you have to add 2-3 more layers...this brush prevents that from happening. Where a softer, larger brush would blend the foundation so much that it seems to have disappeared into oblivion, this will help you target and conceal the areas where you need the most coverage because it is so dense and soft, but just coarse enough to buff the product effectively into the skin. It's tapered shape allows you to really target tiny areas by using just the tip of it, if you please. This is a fantastic brush, and one that is extremely hard to locate. I got mine in a Christmas kit with that included the Tarte The Buffer Brush (one that I am not even mentioning here because I don't think it's that fantastic so far. Maybe it's the large size, but it's not very user-friendly). You can actually get it with a bb cream here on the Tarte website. I know absolutely nothing about the BB cream, and I wish it didn't have to be this way, but whatever, consider it a free bonus?? I use this brush with the Makeup Forever Matte Velvet foundation. It is the most natural-looking foundation I've ever used, bar-none. Then top that with an HD powder and your skin literally looks like a baby's bottom. Price for the brush with that bb cream is $48. Tarte needs to start selling them individually!!! :)
So there you are, my three top foundation brushes. I just adore them... and for great reasons. I honestly am completely happy with my foundation brush collection...for now :) But really, these have been (no pun intended) covering everything for me, with every foundation I've tried, and flawlessly.
Honorable Mentions:
The Real Techniques Buffing Brush from their Core Collection. Great foundation brush, quick application, but streaky and a little coarse. You need to do extra patting with the brush to get rid of the streaks, but once you do that you have a great application.
The Real Techniques Expert Face Brush--great foundation brush but very small to apply all over the face. VERY soft. Allows for precision, but is time-consuming to use because of it's size and can be harder to blend with evenly all over the face because of both it's size and density combined.
Foundation isn't something that I have always worn. Back in the day, I fervently believed that foundation, of all makeup, was the worst for your skin, probably from just grabbing the first drugstore foundations with cute packaging I saw, not washing my face beforehand, and promptly breaking out from them. (ALWAYS have a clean face before applying foundation).
I still do believe that not all foundations are created equal, and I don't wear foundation every time I wear makeup personally, but that's an entirely different topic all together. The weather can completely affect what your skin is doing and what foundations you use, because dry climates can dry out the skin, and humid/hot ones can make it become more oily. Plus hormones, and food allergies. Your skin is a piece of work :) So clean these brushes as often as you need to, keep your face clean, and choose the right products for you... And hopefully what I write here can help you navigate that a little bit. Or if you just like brushes as much as I do, come on and lets get to the brushes!
So I have several foundation brushes that I rotate depending on what foundation I want to use and what mood I am in. And these three, all-encompassingly, are the most fantastic of the bunch. I ADORE these.
Qualities I Seek From A Fantastic Foundation Brush:
1. This is the most base (no pun intended) requirement, but sturdiness. Your foundation brush has to do more blending than all of your other brushes. It better not feel like it's falling off the handle. And this is no time to have ANY bristles falling out. If all of your other brushes are sub-par, fine, as long as your foundation brush is quality.
2. Blurring effect. I don't want any streaks when I put on my foundation. My foundation should look soft, blended, and impeccable, and brush streaks anywhere on the face mean that the brush isn't doing it's job correctly. The brushes I am recommending here, astonishingly, do not leave any brush marks.
3. Softness. I don't want a coarse brush scratching against my face. The application should feel luxurious and smooth, I don't want to worry about over-exfoliating my face while I'm doing my foundation.
4. Low product absorption. I don't buy foundation so half of the product I apply can be absorbed into my brush. These brushes perform to blend the foundation into my face, and if any foundation is absorbed into the brush, they still do such a quick, even application that I use far less product than I would have, had I used my fingers to apply the same product.
All of these brushes have these qualities, but a couple of the brushes have some more than others. I'll explain why each of these are great for different densities of foundations, which qualities of each brush will apply to which foundations, and how the brushes perform on the face. These are in order from my most favorite to least favorite. So without further ado, here they are :)
1. The IT Cosmetics Velvet Luxe LBD Foundation Brush #302. Sigh... I can't stop touching this brush. This is by far the softest foundation brush I have ever touched, even softer than the much-touted Makeup Forever artisan brush line (of which, does not blend well at all, I've found, for some strange reason, and I promptly returned it). It blends pretty much any foundation like a dream. It feels wonderful against the skin because it literally is so velvety soft. And best of all, I don't know why, I don't know how...but it absorbs no product. This is a rave review here, honestly. I can go much longer (than I probably even should) between washings with this brush because it seriously absorbs barely any product, making the brush save me money because I have to spend less on foundation due to the fact that I'm using far less. This is wonderful. If I had to get rid of all of my makeup brushes and could only keep one, I would keep this brush. It is my ideal foundation brush. I really haven't found a liquid foundation yet that it doesn't apply to the skin fantastically. Unpictured, it even has a little rhinestone at the bottom of the brush, which is a cute touch (one I don't really care about, as the brush is already so fantastic). I love using this brush with every foundation I own, but I prefer to use the bdellium for the thicker foundations because it seems like it's bristles would be hardier with those, though this one does still blend thick foundations like a dream and it's also easier to blend with this brush because it's so soft and fits better into the nooks and crannies of the face. You only have to touch this brush to unblended points of the face, lightly press, to blend, and by buffing you move everything quickly into a beautiful place because it's so soft and round. I would hardly ever say this about anything makeup related, but this brush is worth every penny of $38. They can be purchased at Ulta only, at this point in time.
2. Bdellium Tools 957 Brush. This brush is excellent at applying thicker foundations like Kat Von D and all medium thickness foundations. It just completely splays out the foundation everywhere on the face and it is such a soft, teddy-bear feeling kind of a brush, unlike the Velvet Luxe which is more silky soft. I love the feeling of this brush ALMOST as much as the previous brush and I would not want to do without this brush in my collection because it is so uniquely warm and soft feeling. Pillowy. I do not recommend this brush for thin watery foundations because it will absorb more product, but even then it should still blend absolutely gorgeously. I love the way this brush blends and buffs product into my skin. I use a swiping, circular motion. You do have to pat it ever so slightly more than the velvet luxe to get a beautiful blend and it is larger so it doesn't fit on the face as well, but no matter. It is also fluffier and less dense, which could be a good thing. Beautiful, soft application, no streaks, easy to apply. I adore it. I got mine on Amazon for $12. The price seems to fluctuate, right now it's actually $11.26, but I've also seen it go up to $14. Here is the link to specifically where I bought it. That is absurdly cheap for a foundation brush that is this effective. There are other colors, I just adore the pink one. And I couldn't tell ya whether the other colors are any different... I'm thinking that the yellow and green are probably the same but I'd be weary about the one with the brown bristles. ALSO, you do have to wash this brush more than the other two brushes listed, as it absorbs more foundation and the bristles clump together far quicker. Clean foundation brushes mean a better application.
3. Here is where things get different. This is the Tarte The Balancing Act Bamboo Foundation Brush. I LOVE this brush for extremely thin, liquidy foundations because it absorbs absolutely no product, something that's harder to achieve with thicker, softer brushes (although the Velvet Luxe would probably do it fantastically too). It is also SO EASY to fit this brush into all the nooks and crannies of the face, and since thin foundations are hard to target directly in certain areas, this brush is the ticket to having those foundations give you the coverage you are looking for in those areas because it picks up and applies those products to just where you want them, without blending them out into the rest of the face and into blended-into-nothingness. You know, when you're like, "Wait, did I even put foundation on? What gives?!" And you have to add 2-3 more layers...this brush prevents that from happening. Where a softer, larger brush would blend the foundation so much that it seems to have disappeared into oblivion, this will help you target and conceal the areas where you need the most coverage because it is so dense and soft, but just coarse enough to buff the product effectively into the skin. It's tapered shape allows you to really target tiny areas by using just the tip of it, if you please. This is a fantastic brush, and one that is extremely hard to locate. I got mine in a Christmas kit with that included the Tarte The Buffer Brush (one that I am not even mentioning here because I don't think it's that fantastic so far. Maybe it's the large size, but it's not very user-friendly). You can actually get it with a bb cream here on the Tarte website. I know absolutely nothing about the BB cream, and I wish it didn't have to be this way, but whatever, consider it a free bonus?? I use this brush with the Makeup Forever Matte Velvet foundation. It is the most natural-looking foundation I've ever used, bar-none. Then top that with an HD powder and your skin literally looks like a baby's bottom. Price for the brush with that bb cream is $48. Tarte needs to start selling them individually!!! :)
So there you are, my three top foundation brushes. I just adore them... and for great reasons. I honestly am completely happy with my foundation brush collection...for now :) But really, these have been (no pun intended) covering everything for me, with every foundation I've tried, and flawlessly.
Honorable Mentions:
The Real Techniques Buffing Brush from their Core Collection. Great foundation brush, quick application, but streaky and a little coarse. You need to do extra patting with the brush to get rid of the streaks, but once you do that you have a great application.
The Real Techniques Expert Face Brush--great foundation brush but very small to apply all over the face. VERY soft. Allows for precision, but is time-consuming to use because of it's size and can be harder to blend with evenly all over the face because of both it's size and density combined.
Friday, January 2, 2015
Still Here :) STILL Very Much Into Makeup!!!!
Hi everybody. I hate that this has become one of those blogs where the person NEVER updates and always apologizes for it, some excuse about jobs, whatever, and it's like, who cares, just get on with the post. So I'm not going to apologize after this time!!! I'm busy as hell, still LOVE makeup and I'll update when I want! Got it?! :)
I recently got hired at a makeup store, something I'm truly enjoying, and I've learned that even a job you enjoy is still HARD. WORK. Partly because it is still just a beginner, foot-in-the-door position, I put a lot of energy into my job, but I still feel super happy expending that energy because it's something I'm enjoying doing.
How silly am I coming across when I say this next phrase? VERY, but who cares. ON TO THE MAKEUP!!!
Here are some things I've learned while working at a makeup store (and also ordering some raw ingredients online because I'm curious about making my own makeup):
1. Powder makeup isn't all it's cracked up to be (but it does crack up). People with oily skin especially think that powder makeup is their ultimate solution to makeup-wearing. However, a lot of times the cause of oily/broken out skin is food allergies/skin allergies to certain ingredients and the use of harsh chemicals on the skin. Oily skin needs moisturization too, and when you apply harsh chemicals and an excess of powder, the skin will actually over-compensate for it and create even more oils. I also think most powders, with the exclusion of transcluent powders based on silica microspheres and similar ingredients, enhance wrinkles, even the popular high-end ones. I think everyone would benefit more a balance between liquid and powder products that have ingredients in them that won't irritate your skin-type (and since everyone is different, from my knowledge anyway, I can't advise you, you just have to test things, just like with food intolerances). I've found when I'm applying lots of powders, my fine lines begin to look a little deeper even when I take the makeup off. So... I don't know. I use a bit of powder and I've found my skin benefits from it, but I would NOT rely on it for everything in my makeup routine, and I'd hope if you do use it, you also use a good primer or moisturizer.
2. There is makeup you should always buy high-end, and there is makeup you can buy for cheap and it'll work just as good or better.
High-end Products that Always Give The Best Results
--Pencil/retractable eyeliners
--Lipstick--better, less irritating formulas, can easily find ones with longer staying power, many times applies color faster/easier.
--Foundation (while there are some drugstore foundations I absolutely love, I've found that the staying power on my skin and/or the healthiness of my skin is greatly improved when I'm using high-end).
--CONCEALER. I'm not even going to talk about why this is so much better. IT JUST IS. And I'm writing these lists just as the products pop in my head, but this would be at the top of my list.
--Powders, pretty much of every kind unless it's a setting powder based on silica microspheres (elf has one, it's the HD one), but there are some horrible high-end ones and you'd be better off grabbing drugstore than settling for those.
--Bronzer--much easier blendability, which is a plus for a beginner, since bronzer should always be blended well when contouring. Otherwise, if you are great with bronzer, drugstore is fine. I use drugstore and prefer it because I haven't found a shade I like as much as the one I currently use that is a drugstore version.
--Mascara. There will always be a high-end option that performs just SLIGHTLY better than your holy-grail drugstore option... and to me, eyelashes are the most important part of makeup. However, if you already have long eyelashes, go for drugstore and don't even worry about it. You don't need slightly better if you already have long eyelashes...but for people with short, choppy ones, slightly can be a LOT.
Cheap Stuff That Is Just As Good:
--Blush--bar none, I find amazing blushes for very cheap, that most of the time, are better than the ones you have to pay high-dollar for, and last longer. You may find some kind of shimmery, iridescent quality or fast blendability in high-end blushes that is superior to ones you can get for cheap, but other than that, they ALL apply the same and look just as gorgeous and last just as long interchangably, especially if you use a cream blush and then set it with a powder blush.
--Gel eyeliner--It is amazing, drugstore or high-end, and applies and behaves exactly the same.
--Eyeshadow--like blush, if you want some special shimmery quality or rare color, well, high-end may be your best bet. But again, almost always, unless it's one of the rare high-end shadows that has INCREDIBLE staying power (like Clinique), you are doing yourself a service by buying beautiful, bright, drugstore shadows like Wet N Wild Comfort Zone or the Almay trios and just using a primer.
--Highlighter--Refer to blush (top of this list).
Something I'm Still On The Fence About and Need to Research (need to be honest here!!):--Eyeshadow primer. So far the peach shade of ELF primer has worked the best for me out of ANYTHING, including Urban Decay, but still, everything seems to eventually fade! I think part of the problem is I rub my eyes a lot due to chronic dry eye/or I'm applying eye drops for the same reason. I need to research this badly!
--Face primer. I've used both high-end and drugstore and I'm still on the fence about whether either one is really better than the other. I'm very tempted to add it to the Cheap Stuff That Is Just As Good list, but frankly, I haven't tried enough yet.
--Lipliner--While for me, any lipliner with a dryer formula will do and will last all day, I do have dry, young skin, and I'm concerned that a dry formula on an older person would sink into lines unattractively. I would like to experiment more with different formulas and see if there's one that provides more hydration, won't sink into lines and will provide the same benefits on older skin, because I'm just not clear on HOW lipliner performs on older skin yet.
3. Everyone and their mother has a completely different skin-care routine. Either nobody knows what to use, or everyone's skin is different :) And while I'm very interested in it, it's still REALLY difficult for me to give skin-care advice. There are a billion products/ingredients/terms to know about, in addition to the fact that every person's skin-type is dramatically different from the next person's. All I can tell you is to wash your face every day, always take your makeup off, and moisturize with something that won't irritate you/cause you breakouts, maybe starting with a gel moisturizer if you are acne-prone. Also, often-times, staying away from the same ingredients that cause you stomach upset (peanut oil for example, if you are intolerant to peanuts) can be just as beneficial for your skin.
So that's my entry :)
I recently got hired at a makeup store, something I'm truly enjoying, and I've learned that even a job you enjoy is still HARD. WORK. Partly because it is still just a beginner, foot-in-the-door position, I put a lot of energy into my job, but I still feel super happy expending that energy because it's something I'm enjoying doing.
How silly am I coming across when I say this next phrase? VERY, but who cares. ON TO THE MAKEUP!!!
Here are some things I've learned while working at a makeup store (and also ordering some raw ingredients online because I'm curious about making my own makeup):
1. Powder makeup isn't all it's cracked up to be (but it does crack up). People with oily skin especially think that powder makeup is their ultimate solution to makeup-wearing. However, a lot of times the cause of oily/broken out skin is food allergies/skin allergies to certain ingredients and the use of harsh chemicals on the skin. Oily skin needs moisturization too, and when you apply harsh chemicals and an excess of powder, the skin will actually over-compensate for it and create even more oils. I also think most powders, with the exclusion of transcluent powders based on silica microspheres and similar ingredients, enhance wrinkles, even the popular high-end ones. I think everyone would benefit more a balance between liquid and powder products that have ingredients in them that won't irritate your skin-type (and since everyone is different, from my knowledge anyway, I can't advise you, you just have to test things, just like with food intolerances). I've found when I'm applying lots of powders, my fine lines begin to look a little deeper even when I take the makeup off. So... I don't know. I use a bit of powder and I've found my skin benefits from it, but I would NOT rely on it for everything in my makeup routine, and I'd hope if you do use it, you also use a good primer or moisturizer.
2. There is makeup you should always buy high-end, and there is makeup you can buy for cheap and it'll work just as good or better.
High-end Products that Always Give The Best Results
--Pencil/retractable eyeliners
--Lipstick--better, less irritating formulas, can easily find ones with longer staying power, many times applies color faster/easier.
--Foundation (while there are some drugstore foundations I absolutely love, I've found that the staying power on my skin and/or the healthiness of my skin is greatly improved when I'm using high-end).
--CONCEALER. I'm not even going to talk about why this is so much better. IT JUST IS. And I'm writing these lists just as the products pop in my head, but this would be at the top of my list.
--Powders, pretty much of every kind unless it's a setting powder based on silica microspheres (elf has one, it's the HD one), but there are some horrible high-end ones and you'd be better off grabbing drugstore than settling for those.
--Bronzer--much easier blendability, which is a plus for a beginner, since bronzer should always be blended well when contouring. Otherwise, if you are great with bronzer, drugstore is fine. I use drugstore and prefer it because I haven't found a shade I like as much as the one I currently use that is a drugstore version.
--Mascara. There will always be a high-end option that performs just SLIGHTLY better than your holy-grail drugstore option... and to me, eyelashes are the most important part of makeup. However, if you already have long eyelashes, go for drugstore and don't even worry about it. You don't need slightly better if you already have long eyelashes...but for people with short, choppy ones, slightly can be a LOT.
Cheap Stuff That Is Just As Good:
--Blush--bar none, I find amazing blushes for very cheap, that most of the time, are better than the ones you have to pay high-dollar for, and last longer. You may find some kind of shimmery, iridescent quality or fast blendability in high-end blushes that is superior to ones you can get for cheap, but other than that, they ALL apply the same and look just as gorgeous and last just as long interchangably, especially if you use a cream blush and then set it with a powder blush.
--Gel eyeliner--It is amazing, drugstore or high-end, and applies and behaves exactly the same.
--Eyeshadow--like blush, if you want some special shimmery quality or rare color, well, high-end may be your best bet. But again, almost always, unless it's one of the rare high-end shadows that has INCREDIBLE staying power (like Clinique), you are doing yourself a service by buying beautiful, bright, drugstore shadows like Wet N Wild Comfort Zone or the Almay trios and just using a primer.
--Highlighter--Refer to blush (top of this list).
Something I'm Still On The Fence About and Need to Research (need to be honest here!!):--Eyeshadow primer. So far the peach shade of ELF primer has worked the best for me out of ANYTHING, including Urban Decay, but still, everything seems to eventually fade! I think part of the problem is I rub my eyes a lot due to chronic dry eye/or I'm applying eye drops for the same reason. I need to research this badly!
--Face primer. I've used both high-end and drugstore and I'm still on the fence about whether either one is really better than the other. I'm very tempted to add it to the Cheap Stuff That Is Just As Good list, but frankly, I haven't tried enough yet.
--Lipliner--While for me, any lipliner with a dryer formula will do and will last all day, I do have dry, young skin, and I'm concerned that a dry formula on an older person would sink into lines unattractively. I would like to experiment more with different formulas and see if there's one that provides more hydration, won't sink into lines and will provide the same benefits on older skin, because I'm just not clear on HOW lipliner performs on older skin yet.
3. Everyone and their mother has a completely different skin-care routine. Either nobody knows what to use, or everyone's skin is different :) And while I'm very interested in it, it's still REALLY difficult for me to give skin-care advice. There are a billion products/ingredients/terms to know about, in addition to the fact that every person's skin-type is dramatically different from the next person's. All I can tell you is to wash your face every day, always take your makeup off, and moisturize with something that won't irritate you/cause you breakouts, maybe starting with a gel moisturizer if you are acne-prone. Also, often-times, staying away from the same ingredients that cause you stomach upset (peanut oil for example, if you are intolerant to peanuts) can be just as beneficial for your skin.
So that's my entry :)
Tuesday, October 14, 2014
October 2014 Ipsy Bag!! :)
Without further ado, let's get into what was put in MY bag this month!!!
What I Got This Month:
Pretty teal bag
Rihanna Rogue Perfume, .5 oz
Smashbox Photo Finish Primer - Pore Minimizing Formula, .25 oz
Starlooks Lip Gloss, .3 oz
Indie Lee Brightening Cleanser, .5 oz
Mica Beauty Mineral Eye Shadow - Harlequin, .1 oz
Thoughts On Each Product:
Rihanna Rogue Perfume: This came in it's own box, separate from the bag :) It is a beautiful, classy looking bottle, and the lid grasps tightly onto it, but you need to give it a little push to do so, and be careful not to tilt it to the side, because you may accidentally squeeze down the perfume, but for me it's not close to being unmanageable and nothing really to complain about. The smell is WONDERFUL. Upon initial application--those first ten seconds, you do get a bit of a mosquito spray smell mixed with somewhat of an orange oil smell. 20 seconds later, it just smells fresh and clean, with a hint of floral/sugary sweetness. And a few minutes later, the sweetness really blooms and you're left with this wonderful, feminine, clean scent that isn't over-powering. I adore it. It's nothing like any of the perfumes I own and I feel as if this is a scent I could even wear to job interviews and be taken seriously with it on. It's truly a perfect blend that isn't too much. My favorite product of the lot. I would absolutely consider buying the full size bottle.
Smashbox Photo Finish Primer: This is NOTHING like the original Smashbox primer, which I'm not a big fan of. Right after application, it completely smooths the skin, not sinking into fine lines or pores but just leaving a blank canvas. It absorbs oil and almost feels powdery. It ALMOST looks as if it's brinking into the appearance of looking powdery as well, but it just looks natural and lovely. I adore it. Because this bag is new however, I question the staying power of it. I will update this review when I know how it performs better.
![]() |
| Starlooks Lip Gloss, Mica Beauty Eyeshadow - Harlequin, Smashbox Photo Finish Primer - Pore Minimizing Formula |
Indie Lee Brightening Cleanser: I ADORE the smell of this. It smells like strawberry, bubblegum, soapy heaven...but more expensive than that (in my humble opinion!). It comes out like a watery gel, and I do recommend applying it to a dry face and RINSING it off afterward rather than applying it to a wet face--it seems to lather better on a dry face, since there's already quite a bit of moisture within the product. It is an extremely gentle formula. I really enjoy it and I think it is gentle enough to use every morning to get the face fresh and clean, though I wouldn't use it alone to remove makeup at the end of the day, as I don't think it'd be enough. Some girls have mentioned using it to clean makeup brushes--I honestly don't think it would do the job thoroughly enough. However, to clean a face that's already had it's makeup removed, it's absolutely lovely and gentle. I enjoy it and it's just what I need. Harsh cleansers are irritating on the skin when used too often. Due to it's gel nature, it's also easy to rinse off. I would consider purchasing the full size of this. I think it's lovely.
Mica Beauty Mineral Eyeshadow - Harlequin: This is 100% pure mica. There are no other ingredients added. This means, you should really use a primer under it to keep your color lasting and in tact!! I have been dying to try pure mica, and I'm glad I got to try out this lovely eyeshadow!! It's a beautiful sea blue-green shade that seems to fade into a lighter green shade. I tried to emphasize this in the swatch, piling on the shade more heavily at the bottom and keeping the swatch faded at the top. There's actually a little weight to the container...I don't see myself running out of this product for a LONG time...As LONG as I use a primer. Would I purchase this? No. You can buy pure mica for MUCH cheaper in bulk if you are interested in it. If I'm to buy an eyeshadow, I want a super unique formula that's going to have longevity and some sort of uniqueness to it, maybe texturally, that makes it superior to pure mica. Pure mica is HARD to beat. It's absolutely GORGEOUS. I highly recommend it. There is so much depth of color. But the downside to it is that if you don't have a good eye primer, it falls off. So buy it in bulk or stick to quality mica eyeshadows that have the unique qualities, and often that means more ingredients, that you desire.
Thoughts On Everything As A Whole:
I loved my bag this month. When I first saw the products I'd be getting on the website, I was disenchanted and even considering canceling my subscription, but when I got them, it was a completely different story. The perfume smells wonderful and, while small, is still a larger size than I thought it would be. The Smashbox Primer appears to be much higher in quality than I'd anticipated. I don't own a shade like the Starlooks Lip Gloss. The brightening cleanser, which I really wasn't enthused about, smells WONDERFUL and is gentle as a dream but still cleanses great. And the mica finally gave me a taste of what pure mica is like--and I personally LOVE it, but I'm weary of the staying power!!
If you're interested in subscribing to Ipsy's monthly service, you can do so by following this link :)
Just a fun little treat I get every month. If things start looking not so good, I may unsubscribe, but so far, every month I have been cheered by these little presents I get! Something small and fun, just for myself :) If you subscribe, I'd love to hear if it works out for you :) And take that beauty quiz! It helps!!
Monday, October 13, 2014
The Seven Makeup Products I Run Out Of The Slowest!!! (and one disposable makeup tool!)
![]() |
| Why won't you die?!?! |
But what about the ones you use on a daily basis, but you just run out of it slower than others?! Isn't that helpful to know? For myself personally, I like to stock up on what I actually need, that way I can save money and not waste money repurchasing products that I probably will never run out of at this point :) (Unless of course I want to repurchase it because it is a BETTER product. But that's a different story!!)
For the minimalists, the budgeters, it's nice to know what products we use the least of that way we can save both space and money for the products that we go through quickly!!
So without further ado, here are the makeup products that take ME the longest to use up!!! Yours could be completely different than mine, however hopefully this will give you a sense for what takes you a long time to use up too!! It's nice to know what we should be repurchasing and what we should be saving money for :)
Note: I have pale, combo skin. There are a few things on here that you may run out of slightly quicker than me if you don't have one or both of these things, and that's totally okay!! :)
1. Bronzer. I have to mention bronzer here. It seems I can barely put a dent in a pan of bronzer, even though I have the fairest shades available from 3 or 4 companies. It may have something to do with the fact that I have pale skin, and dousing the stuff all over my face will surely lead to me looking strange, like I just played in a pile of dirt!!! So for my skin-tone, bronzer is definitely a staple, but it's something I run out of extremely slowly!!!
2. Powder Highlighter. All you need is a tiny pinch of this magical fairy-dust and your skin is alive and glowing... Highlighter is quite possibly my FAVORITE item of makeup to use... And yet, for some reason powder highlighter still takes forever to go through, in spite of my love to reapply the stuff at the most unnecessary of times!!! :) I would say I go through it much faster than bronzer, but to this day, the only highlighter I've ever hit pan on was one I was using continuously as my only highlight shade for 5 years!!! :P (I've broadened my horizons since then...)
3. Pressed colorful eyeshadows. Girls, lets be real here--how long does it take you to finish up one pan of eyeshadow in a COLORFUL shade (not neutrals, you can douse those on and they run out a lot faster!!!)?! Depending on the pigmentation of the shade, you could be using the same one shade for years and still not even reach pan. Makeup Forever Diamond Shadow in Turquoise, I am looking at you!!! I used this shade almost every day for a year when I was in college because I thought it was so beautiful--and this was back when I didn't know about primer and had to reapply!!! If the shadow were not cracked to pieces (While I've done this with other shadows and they still gave the same performance, I am too afraid to alcohol this one in case it musses up its beautiful formula), it still would not even be close to hitting pan!!! It's hard to run out of a good colored eyeshadow...but maybe I should let this one slide, after all, we could always use another color!! ;P
4. Pressed powder. It feels like an eternity before I finally finish a pressed powder!!! Considering it is a full-face product, you would expect it to disappear into thin air! It could be because my skin only gets oily in my t-zone. A powder that definitely deserves a mention here is Coty Airspun powder in translucent. I'm not sure what it is about the stuff, but it takes an extremely small amount to cover and absorb oils on my face.
5. Blush. I have somewhat of a blush addiction. It's definitely the makeup item I own the most of, next to eyeshadows (which are a lot easier to come by and come in much larger packs!). On my skin tone, I also need very little to accomplish a brightly flushed look, so I have to use it sparingly. I have around 25 of the La Femme blushes, and may I say I think I could use ONE of those blushes every single day for a year and probably not put a dent in it?! I rarely find that my blush disappears. However there are a few exceptions: I just bought the NYX blush in the shade "Pinched," and my goodness, it's disappearing fast!! I suppose it also depends on the pigmentation and the amount of product you are given in a container as well. But anyway, for the most part, blush is a definite slow-go in my collection (and yet I still can't get enough of it!!! Always looking for new colors and formulas!).
6. Lipstick/Lip Gloss. Oh lip products, what is it about you? I was honestly unsure if I should even include this in the list, but it had to be done. In my entire life-time, I've only managed to completely finish one container of lipstick, and I have NEVER finished a lip gloss (granted, until recently, I used lipgloss far, far less, so we will see!). It isn't like they give you very much product in the tubes. Could it be because I surround myself in a bounty of different colors and combinations at all times? Is it the fact that I'm using less because I'm layering liners beneath it and glosses above it--even though half the time I am solely using it on it's own? I honestly don't know. I reapply my lip products plentifully throughout the day, and yet for some reason, my lipsticks last me years. They don't disappear!!
7. Perfume. I know technically perfume is not considered makeup, but to me it is something that is so like it, it may as well be included. It is a product from a small container that you put on your body to boost your confidence :) So, sorry if you disagree, but this absolutely HAD to be included on this list. I NEVER run out of this stuff!!! In my entire life time, I have only managed to finish one bottle of full-sized perfume--it was back in Middle School, and it was the only perfume I'd owned at the time, so naturally being the only one I was using, and being used on a daily basis, it eventually ran out! (It was the blue bottle of Ralph by Ralph Lauren :) ) Years later, I now have an entire tray of bottles that still have plenty of perfume left inside them, and these are bottles I've been accumulating for almost a decade now. In spite of their regular use (for me, every other day), bottles of perfume seem to last me forever!! Are you the same way?
And the random funny thing that everyone seems to need, but I personally never seem to run out of:
Q-tips!!! What is it about these little guys? I am aware they have their uses, but I find I'm hardly ever at a loss for a q-tip, and it's definitely not something I use on a regular basis (though after a lower-lid mascara mishap today, I'm starting to believe they could be a very good thing for getting smears beneath the lashes). Could it be the fact they come in packs of 500, or the fact that sometimes, not liking to waste and money-saving loving as I am, I'll grab big handfuls and cut them in halves all at once?! These guys NEVER run out!!! I have had the same two boxes of purple and blue ones for YEARS.
What do you think the next entry will be? I have a hunch it's going to be the list of products that I use the quickest ;) These are definitely the things we should be saving our money for if we enjoy wearing makeup!!
Hope you had fun, if not you can leave :P
Take care!
PS: For sure, without fail, the makeup item that I've had the absolute HARDEST TIME using up is the one in the picture at the top of this blog. It's a bronzer from Victoria's Secret called Bare Bronze. The stuff is so packed into the pan that it's hard, dense, and heavy, and it's also difficult to load onto a brush unless it's something like the NARS Ita brush (I have the Sonia Kashuk version). The thing sat in a cabinet in a while (before I realized the goodness of how it went on my skintype and how to apply it), and then in the last 3 years I've been wearing it at least a few times a week...and it still pretty much looks brand new, dare I say it, even untouched!!!! Kinda funny!! :) So I thought it was perfect to put at the top of the entry juxtaposed with the sunflower!!
Sunday, September 28, 2014
How To Be "Naturally Beautiful"
Being, "Naturally Beautiful," is some sort of phenomenon. It is always hilarious to me when, because I wore a bright or dark eyeshadow or lipstick color, or decided to wear black eyeliner, now I'm brinking into, "Un-Naturally Beautiful," territory, even though to be, "Naturally Beautiful," I still was using NINE OTHER PRODUCTS. To dilute the ignoramus of it all I decided to put together this little tutorial.
How To Be Naturally Beautiful
Step 1: Your skincare. Let's face it, you are going to get old and wrinkly FAST unless you have a good skin-care regime. Use sunscreen and a moisturizer that doesn't break you out. Because lord knows, PIMPLES are NOT Naturally Beautiful. They may be natural, but they are not beautiful!!
In this picture, I am somewhat in the dark. I wouldn't DARE go in bright sunlight with no makeup on and take the picture, because we all know that's not a naturally beautiful sight...
Step 2: Prime your face. I'm using a primer that diminishes my larger pores and creates a smooth canvas on my face. That's what primers are supposed to do. Pores are NOT beautiful, so best you cover them somehow, and since primers are sheer, you won't look like you have extra makeup on your face!
The product is called, "Dr. Brandt," Pores No More. It works awesomely, but it's pretty freaking expensive and I'm not going to go out and purchase it (this was a sample). So best you go buy the cheapest, somewhat shittier primer that you can find, like I will do when this runs out. Don't worry though, your makeup is the most important part in being Naturally Beautiful.
Step 3: This is the most important part. Applying your concealer. Since you want to use as few skin-covering products as possible (to eliminate the chance of cakiness), I highly recommend skipping foundation and just going straight to a high-coverage concealer that will kill two birds with one stone. Also, apply it with a beauty blender (I recommend the Real Techniques Complexion Sponge). Applying it with a beauty blender will sheer out the high coverage concealer and provide you a natural finish that most makeup brushes can't achieve. So everything looks like it's just your skin. BUT BETTER.
Now because most of the colors and impurities in your face are gone, your skin looks rather flat. But not to worry!! You'll be covering this with makeup that creates the Naturally Beautiful Look once again.
Step 4: Applying your powder. Because you want this look to be as natural as possible and you also want it to last as long as possible, you need a decent powder, one that will leave a natural finish. I think the powder I chose not only sets, but makes the concealer I used look more natural than the concealer would by itself. Many people use bare minerals for this, I just use Elf Mineral Booster in shimmer. Also a lot of people use HD powders, which are really just Dimethicone and Silica mixed together and you can get them for a hell of a lot cheaper at websites like TKBtrading.com... You just want something that isn't going to settle in your fine lines or look cakey. After all THAT wouldn't look natural. You can't just choose powder, you have to choose the RIGHT powder.
I applied with the ELF Large Stipple Brush because I think it applies the powder sheerly, avoiding even more chances of cakiness. And yes, that's a hair-tie around it, go back a couple entries and you'll see why I did that. (And if you're not noticing yet, yes I use a lot of ELF products. Why buy something expensive when I can have something cheap that works just as well?)
Step 5: Choose your blush WISELY. Lord knows, a bright pink one and you'll be accused of being Un-Naturally Beautiful once again. I opted for the one on the left. It's kind of a berry tone and on my skin looks like I was walking around in the cold and got a little flushed. You can do swatches on your arms to see which looks the most natural on you. Then pick the blush that goes with the best swatch, and voila!!
Make sure to apply your blush with an excellent brush. I will explain this in further detail in another entry, because I don't think other people emphasize this enough, but it is truly easiest to apply blushes with a dense, soft, fairly large blush because it will blend the color into your skin a hell of a lot easier and cover more surface area, allowing for a quick application. Of course you don't want to use that type of brush for the high-pigmented blushes.
Oh, look I yawned. Don't wanna do that in front of people without covering your mouth!! That's not Naturally Beautiful!!
On second thought, pose with your blush brush for a second. Look at you, you're almost done!! Being Naturally Beautiful took a lot of steps, know-how, and techniques, didn't it!?
Step 7: Now, pick out your lip product. I know what you're thinking here. Hey, that nude-colored lipstick doesn't look too bad!! WRONG. You want to have color on your lips, but if they look completely covered in lipstick, that won't be Natural Looking enough. And if you choose the red one, you're screwed.
You know how to put on lipgloss. Voila.
Step 8: Oh, didn't anybody tell you that your eyelids by themselves are too veiny? Well here, I just handed you that gem without you even asking. Now apply some nude colored eyeshadow (whatever color you may be).
Make sure to blend it in really well with your finger. Lord knows if it looks too powdery what will be going through the minds of those Wise People all around you.
Step 9: Lovingly gaze at the pile of products you used to accomplish this Natural Look. You're done mother*cker!
In some lightings, you'll SUPER-won't-look-like-you-did-your-makeup!
Knowledge is power baby, knowledge is power.
In fact, the more casual you act and the less you look like you give a shit, the more Naturally Beautiful the Wise People around you tend to think you are.
BOOM! And done!!
Product List (GAH, I hate writing this part.):
*Burt's Bees Intense Hydration Night Cream With Clary Sage
*Hawaiian Tropic Silk Hydration Face Oil Free Lotion Sunscreen
*Dr. Brandt Pores No More (I plead with you not to buy this)
*Glamoflauge Concealer in the shade Ultra Light
*Real Techniques Complexion Sponge
*Elf Mineral Booster in the shade Shimmer
*Elf Stipple Brush (it's the large one but they don't name it large...hence my writing it that way)
*Elf Mineral Pressed Blush in the shade Wanderlust
*Bestope Premium Synthetic Kabuki Brush (the rounded one. This was shipped from China and I am kind of ashamed of buying it)
*Elf Eye Enhancing Mascara
*Elf Conditioning Lip Balm in the shade (what a surprise) Nice & Natural
*Elf Essential Brow Comb and Brush
*Mary Kay Mineral Eye Color in the shade Silky Caramel (not sure they sell this shade anymore, but there are many similar shades in the line if you're looking to buy the exact same brand I used...it's pretty pricey and I bought it at a weak moment in my sophomore year of college.)
Total Number of Products Used To Achieve Naturally Beautiful Look: 13
Sarcasm Scale: 100%
I Didn't Give A Shit Level: Off The Charts
Percentage of Dumbassery That Prompted Me To Write This Entry: 100%
PS: No, I'm not an egotist, I don't think I'm amazing looking, and I didn't write this to show-off... Saying How To Be Naturally Beautiful was all in good fun and in sarcasm and I felt the need to write this PS in case anyone for some reason felt strongly otherwise.
How To Be Naturally Beautiful
Step 1: Your skincare. Let's face it, you are going to get old and wrinkly FAST unless you have a good skin-care regime. Use sunscreen and a moisturizer that doesn't break you out. Because lord knows, PIMPLES are NOT Naturally Beautiful. They may be natural, but they are not beautiful!!
In this picture, I am somewhat in the dark. I wouldn't DARE go in bright sunlight with no makeup on and take the picture, because we all know that's not a naturally beautiful sight...
Step 2: Prime your face. I'm using a primer that diminishes my larger pores and creates a smooth canvas on my face. That's what primers are supposed to do. Pores are NOT beautiful, so best you cover them somehow, and since primers are sheer, you won't look like you have extra makeup on your face!
The product is called, "Dr. Brandt," Pores No More. It works awesomely, but it's pretty freaking expensive and I'm not going to go out and purchase it (this was a sample). So best you go buy the cheapest, somewhat shittier primer that you can find, like I will do when this runs out. Don't worry though, your makeup is the most important part in being Naturally Beautiful.
Step 3: This is the most important part. Applying your concealer. Since you want to use as few skin-covering products as possible (to eliminate the chance of cakiness), I highly recommend skipping foundation and just going straight to a high-coverage concealer that will kill two birds with one stone. Also, apply it with a beauty blender (I recommend the Real Techniques Complexion Sponge). Applying it with a beauty blender will sheer out the high coverage concealer and provide you a natural finish that most makeup brushes can't achieve. So everything looks like it's just your skin. BUT BETTER.
Now because most of the colors and impurities in your face are gone, your skin looks rather flat. But not to worry!! You'll be covering this with makeup that creates the Naturally Beautiful Look once again.
Step 4: Applying your powder. Because you want this look to be as natural as possible and you also want it to last as long as possible, you need a decent powder, one that will leave a natural finish. I think the powder I chose not only sets, but makes the concealer I used look more natural than the concealer would by itself. Many people use bare minerals for this, I just use Elf Mineral Booster in shimmer. Also a lot of people use HD powders, which are really just Dimethicone and Silica mixed together and you can get them for a hell of a lot cheaper at websites like TKBtrading.com... You just want something that isn't going to settle in your fine lines or look cakey. After all THAT wouldn't look natural. You can't just choose powder, you have to choose the RIGHT powder.
I applied with the ELF Large Stipple Brush because I think it applies the powder sheerly, avoiding even more chances of cakiness. And yes, that's a hair-tie around it, go back a couple entries and you'll see why I did that. (And if you're not noticing yet, yes I use a lot of ELF products. Why buy something expensive when I can have something cheap that works just as well?)
Step 5: Choose your blush WISELY. Lord knows, a bright pink one and you'll be accused of being Un-Naturally Beautiful once again. I opted for the one on the left. It's kind of a berry tone and on my skin looks like I was walking around in the cold and got a little flushed. You can do swatches on your arms to see which looks the most natural on you. Then pick the blush that goes with the best swatch, and voila!!
Make sure to apply your blush with an excellent brush. I will explain this in further detail in another entry, because I don't think other people emphasize this enough, but it is truly easiest to apply blushes with a dense, soft, fairly large blush because it will blend the color into your skin a hell of a lot easier and cover more surface area, allowing for a quick application. Of course you don't want to use that type of brush for the high-pigmented blushes.
Oh, look I yawned. Don't wanna do that in front of people without covering your mouth!! That's not Naturally Beautiful!!
On second thought, pose with your blush brush for a second. Look at you, you're almost done!! Being Naturally Beautiful took a lot of steps, know-how, and techniques, didn't it!?
Step 6: Apply your mascara. If you can get away with it, do NOT use a clumpy mascara. People see clumps in your mascara and they run off saying, "YOU ARE NOT NATURALLY BEAUTIFUL!!!" You can even wear some natural looking false eyelashes (Revlon Precision lash glue is supposed to be a good glue), I won't tell anybody. And dear GOD, comb out the clumps! But don't comb it too thoroughly, if your lashes are not tangled a little bit, that might look too unnatural!!
Step 7: Now, pick out your lip product. I know what you're thinking here. Hey, that nude-colored lipstick doesn't look too bad!! WRONG. You want to have color on your lips, but if they look completely covered in lipstick, that won't be Natural Looking enough. And if you choose the red one, you're screwed.
You know how to put on lipgloss. Voila.
Step 8: Oh, didn't anybody tell you that your eyelids by themselves are too veiny? Well here, I just handed you that gem without you even asking. Now apply some nude colored eyeshadow (whatever color you may be).
Make sure to blend it in really well with your finger. Lord knows if it looks too powdery what will be going through the minds of those Wise People all around you.
Step 9: Lovingly gaze at the pile of products you used to accomplish this Natural Look. You're done mother*cker!
In some lightings, you'll SUPER-won't-look-like-you-did-your-makeup!
Knowledge is power baby, knowledge is power.
In fact, the more casual you act and the less you look like you give a shit, the more Naturally Beautiful the Wise People around you tend to think you are.
BOOM! And done!!
Product List (GAH, I hate writing this part.):
*Burt's Bees Intense Hydration Night Cream With Clary Sage
*Hawaiian Tropic Silk Hydration Face Oil Free Lotion Sunscreen
*Dr. Brandt Pores No More (I plead with you not to buy this)
*Glamoflauge Concealer in the shade Ultra Light
*Real Techniques Complexion Sponge
*Elf Mineral Booster in the shade Shimmer
*Elf Stipple Brush (it's the large one but they don't name it large...hence my writing it that way)
*Elf Mineral Pressed Blush in the shade Wanderlust
*Bestope Premium Synthetic Kabuki Brush (the rounded one. This was shipped from China and I am kind of ashamed of buying it)
*Elf Eye Enhancing Mascara
*Elf Conditioning Lip Balm in the shade (what a surprise) Nice & Natural
*Elf Essential Brow Comb and Brush
*Mary Kay Mineral Eye Color in the shade Silky Caramel (not sure they sell this shade anymore, but there are many similar shades in the line if you're looking to buy the exact same brand I used...it's pretty pricey and I bought it at a weak moment in my sophomore year of college.)
Total Number of Products Used To Achieve Naturally Beautiful Look: 13
Sarcasm Scale: 100%
I Didn't Give A Shit Level: Off The Charts
Percentage of Dumbassery That Prompted Me To Write This Entry: 100%
PS: No, I'm not an egotist, I don't think I'm amazing looking, and I didn't write this to show-off... Saying How To Be Naturally Beautiful was all in good fun and in sarcasm and I felt the need to write this PS in case anyone for some reason felt strongly otherwise.
Saturday, September 13, 2014
Earthy Barbie Makeup Tutorial :)
A couple days ago, I decided to do a makeup look that I call, “Earthy Barbie.”
Because let’s face it…Barbie may have been ALMOST perfect, but one thing was missing...
Ain’t one barbie that was ever played with had perfect hair.
I wanted to do something different from your typical dolly-look—something that popped somehow and created an edge, but brought the dolly-look down to earth in a way, so you’d have the girly cutesyness, but you’d also have something that kept barbie a bit real, a bit more rugged and up-front, whilst still upholding that girly-girl component. I LOVE contrast, I don’t usually like to do looks that are solidly based on one theme. It’s more fun to bring something new to the table that’s equally as exciting or moreso!! (or boring, if you don’t like makeup…in that case, get out of here!!! Haha just kidding…).
In this look, I did a smokey eye with some neutral tones, a bright pink lip, and of course, pink blush. To open the eyes, I did not use any eyeliner. Feel like you've got it? Then unless you like seeing me embarrass myself trying to put my makeup on, you can feel free to be done reading!!!


Here you can see that I have my mascara and foundation on...and then my lips are quite stained from lipstain!! I already tried scrubbing it off to no avail, but since I'd tried 3 different lipstains that day (different blog post), no dice!!! So here is what I'm going to do.
Since I didn't have the shade of lipstick I wanted (a light, baby pink), and my lips were also stained, I opted to do the mixing option. If you've already got a color that works for you and don't like messing around, then just put it on and skip this step!!!
The shades I used are:
A deep emerald green with just a little sheen to it.
A matte yellow-toned poop brown with a small amount of gold glitter (what? I don't know what else to call the shade...It is pretty though. Heh heh :) ).
A pearly beige.
2. Take the emerald shade and put it on the outer corners of your eyes, blending into the lid and traveling the color into your crease. Line the bottom center of your lid with the color, like you would an eyeliner, blending out into where you lined the eye with the matte-brown on each side.
3. Take the pearly shade and put it all over the brow-bone, traveling to the the spot right around the inner-corners of the eyes where you put the matte brown.
Because let’s face it…Barbie may have been ALMOST perfect, but one thing was missing...
Ain’t one barbie that was ever played with had perfect hair.
I wanted to do something different from your typical dolly-look—something that popped somehow and created an edge, but brought the dolly-look down to earth in a way, so you’d have the girly cutesyness, but you’d also have something that kept barbie a bit real, a bit more rugged and up-front, whilst still upholding that girly-girl component. I LOVE contrast, I don’t usually like to do looks that are solidly based on one theme. It’s more fun to bring something new to the table that’s equally as exciting or moreso!! (or boring, if you don’t like makeup…in that case, get out of here!!! Haha just kidding…).
In this look, I did a smokey eye with some neutral tones, a bright pink lip, and of course, pink blush. To open the eyes, I did not use any eyeliner. Feel like you've got it? Then unless you like seeing me embarrass myself trying to put my makeup on, you can feel free to be done reading!!!


(goofing around, trying to act like how I think a Barbie would act for the sake of this blog post :P What I do for you people...HAHA just kidding. It was actually pretty fun!!)
If you like the look, read on for the tutorial!! (or just to see me goofily try to put my makeup on :P ). I personally would wear this makeup look...well, anywhere!
If you want a hair tutorial..... Here's the concensus of what I do:
Twist hair into a bun, wear in bun all day. Take bun out, hair is curly and messy. Shake it around, keep changing the part, don't brush it much and mess it up as much as possible (this will vary amongst hair types...with my hair, it takes little to no effort to mess up).
(FYI, this is not a hair blog.)
Step 1
(Read this whole paragraph before starting if you have sparse lashes and don't like false eyelashes!!). First, put on your mascara. The reason I think you should do this first is because you won't be putting any eyeliner on, so your eyeliner/eyeliner brush isn't going to mess up/tangle the lashes--and since that's out of the way, mascara fall-out can really mess up your foundation, as I'm sure you know. Putting on mascara first eliminates the problem of cleaning up those black dots and ruining your foundation! :) Got sparse lashes? NO problem, apply some false eyelashes...If you have no false eyelashes (or just don't like them), you can use a thin layer of eyeliner, right at the base of your lashes before you put on the mascara, to at least give you some volume to compensate for the length! Dolly-looks typically involve long eyelashes, but do whatever you are comfortable with.
Step 2
Put on a clean, freshly foundationed, concealed, set with powder, face. I won't show you how I put on my foundation in this tutorial, as I think it's kind of boring to mention here and I'd like to elaborate more on my face routine when I do, and also, I don't like my current foundation (I use Revlon Colorstay 24 Hour in Ivory) and am in the process of switching.
Step 3
Now that THAT'S out of the way, it's time to get down to BIDNESS... YAY.
I decided to do the lips first :) (A Little Note: You can do your eyes first also. I like to do eyes before blush because I think your blush brush and your blush can wipe away and cover any fall-out that may have occurred. You could also do the eyes at the same time as you do the mascara (before foundation), eliminating any chance of fall-out ruining your makeup--I just did them after my foundation here as I already had my makeup on because it was the end of the day!!!)
Here you can see that I have my mascara and foundation on...and then my lips are quite stained from lipstain!! I already tried scrubbing it off to no avail, but since I'd tried 3 different lipstains that day (different blog post), no dice!!! So here is what I'm going to do.Since I didn't have the shade of lipstick I wanted (a light, baby pink), and my lips were also stained, I opted to do the mixing option. If you've already got a color that works for you and don't like messing around, then just put it on and skip this step!!!
First, get out concealer or white eyeliner. If you are using white eyeliner, you need to put on a thicker layer for a lighter color now, because it's hard to go back and add white eyeliner after you've already applied lipstick. I ended up using Glamoflauge concealer in the shade Ultra Light. You can purchase it at Walmart for around 7 bucks. Conceal a thin layer all over lips, till they are somewhat of a blanker canvas.
Alrighty, now that that is done, just add your lipstick/lip gloss. I chose a random deep pink gloss that I am totally not recommending to you because it's a balmstain that stained my lips cherry red when I took the concealer off, but anyway, at the surface level the concealer lightened it to a baby pink :) Add any translucent powder to set the color, then blot. You could also use baby powder. :)
Step 4
Eyes. This is actually pretty simple. I only used three colors!! I used a palette that was discontinued from ELF, but these are pretty general shades, so feel free to use whatever and experiment. I think that the NYX Love In Paris eyeshadow palettes in Pardon My French and C'est La Vie would work well :) There are SO many neutral palettes out there, all you need is a matte brown, an emerald green, and any highlight ranging from beige to gold (ooh, that could be really pretty with this) to white and you are good to go.
The shades I used are:
A deep emerald green with just a little sheen to it.
A matte yellow-toned poop brown with a small amount of gold glitter (what? I don't know what else to call the shade...It is pretty though. Heh heh :) ).
A pearly beige.
The matte brown defines the eye and creates some definition (since using all shimmer colors can take away from definition), the darkness of the emerald contours and brightens your eye-color, and the pearly beige highlights and brightens your eye. You can interchange these three colors with other tones, but that was the logic for the shades I chose :)
1. Cover the entire lid of the eye with the matte brown, from corner to corner, blending out into the brow-bone but not allowing the color to enter the brow-bone. Put it on the inner corners of your eyes. Line directly underneath the eye on the inner and outer corners like you would an eyeliner, making sure to blend out, but do not line underneath the middle of the eye.
(I promise my eyebrows don't look this messy in person...But if they did, SO WHAT :P )
2. Take the emerald shade and put it on the outer corners of your eyes, blending into the lid and traveling the color into your crease. Line the bottom center of your lid with the color, like you would an eyeliner, blending out into where you lined the eye with the matte-brown on each side.3. Take the pearly shade and put it all over the brow-bone, traveling to the the spot right around the inner-corners of the eyes where you put the matte brown.
Eyes are done. :)
Step 5
Now you just apply a baby pink blush to the apples of your cheeks, blending out across your cheekbones, to create that dolly-look. Apply it pretty high up on the cheeks, I like to get it almost right under my eyes. If you apply too low it can age you. I also like to put a little blush on the tip of my nose for a little glow, but you don't have to do that!
And you are done!! :) Shine on, Miss!!
(A real barbie has some JANKED UP hair!!!!!!! We all know it.)
Hope that was fun!! I understand it might not be for everyone, but for anyone girly and daring, I think it's a really fun, pretty way to express yourself!! Of course HAHA, you do NOT have to go out in public with a messy, crazy mop of hair :) I did that for the sake of the blog post, but I think messy in a pretty way would be cute with this look. And not that I conform to seasonal makeup in the least, but it could also be a great Fall to Summer look!! Most of all, I hope any tips I shared helped somebody!! Or you at least laughed a little. Take care!! :)
Subscribe to:
Posts (Atom)


.jpg)


.jpg)