Translate

Sunday, September 28, 2014

How To Be "Naturally Beautiful"

Being, "Naturally Beautiful," is some sort of phenomenon.  It is always hilarious to me when, because I wore a bright or dark eyeshadow or lipstick color, or decided to wear black eyeliner, now I'm brinking into, "Un-Naturally Beautiful," territory, even though to be, "Naturally Beautiful," I still was using NINE OTHER PRODUCTS.  To dilute the ignoramus of it all I decided to put together this little tutorial.

How To Be Naturally Beautiful

Step 1:  Your skincare.  Let's face it, you are going to get old and wrinkly FAST unless you have a good skin-care regime.  Use sunscreen and a moisturizer that doesn't break you out.  Because lord knows, PIMPLES are NOT Naturally Beautiful.  They may be natural, but they are not beautiful!!

In this picture, I am somewhat in the dark.  I wouldn't DARE go in bright sunlight with no makeup on and take the picture, because we all know that's not a naturally beautiful sight...


Step 2:  Prime your face.  I'm using a primer that diminishes my larger pores and creates a smooth canvas on my face.  That's what primers are supposed to do.  Pores are NOT beautiful, so best you cover them somehow, and since primers are sheer, you won't look like you have extra makeup on your face!

The product is called, "Dr. Brandt," Pores No More.  It works awesomely, but it's pretty freaking expensive and I'm not going to go out and purchase it (this was a sample).  So best you go buy the cheapest, somewhat shittier primer that you can find, like I will do when this runs out.  Don't worry though, your makeup is the most important part in being Naturally Beautiful.


Step 3:  This is the most important part.  Applying your concealer.  Since you want to use as few skin-covering products as possible (to eliminate the chance of cakiness), I highly recommend skipping foundation and just going straight to a high-coverage concealer that will kill two birds with one stone.  Also, apply it with a beauty blender (I recommend the Real Techniques Complexion Sponge).  Applying it with a beauty blender will sheer out the high coverage concealer and provide you a natural finish that most makeup brushes can't achieve.  So everything looks like it's just your skin.  BUT BETTER.

Now because most of the colors and impurities in your face are gone, your skin looks rather flat.  But not to worry!!  You'll be covering this with makeup that creates the Naturally Beautiful Look once again.


Step 4:  Applying your powder.  Because you want this look to be as natural as possible and you also want it to last as long as possible, you need a decent powder, one that will leave a natural finish.  I think the powder I chose not only sets, but makes the concealer I used look more natural than the concealer would by itself.  Many people use bare minerals for this, I just use Elf Mineral Booster in shimmer.  Also a lot of people use HD powders, which are really just Dimethicone and Silica mixed together and you can get them for a hell of a lot cheaper at websites like TKBtrading.com... You just want something that isn't going to settle in your fine lines or look cakey.  After all THAT wouldn't look natural.  You can't just choose powder, you have to choose the RIGHT powder.

I applied with the ELF Large Stipple Brush because I think it applies the powder sheerly, avoiding even more chances of cakiness.  And yes, that's a hair-tie around it, go back a couple entries and you'll see why I did that.  (And if you're not noticing yet, yes I use a lot of ELF products.  Why buy something expensive when I can have something cheap that works just as well?)


Step 5:  Choose your blush WISELY.  Lord knows, a bright pink one and you'll be accused of being Un-Naturally Beautiful once again.  I opted for the one on the left.  It's kind of a berry tone and on my skin looks like I was walking around in the cold and got a little flushed.  You can do swatches on your arms to see which looks the most natural on you.  Then pick the blush that goes with the best swatch, and voila!!


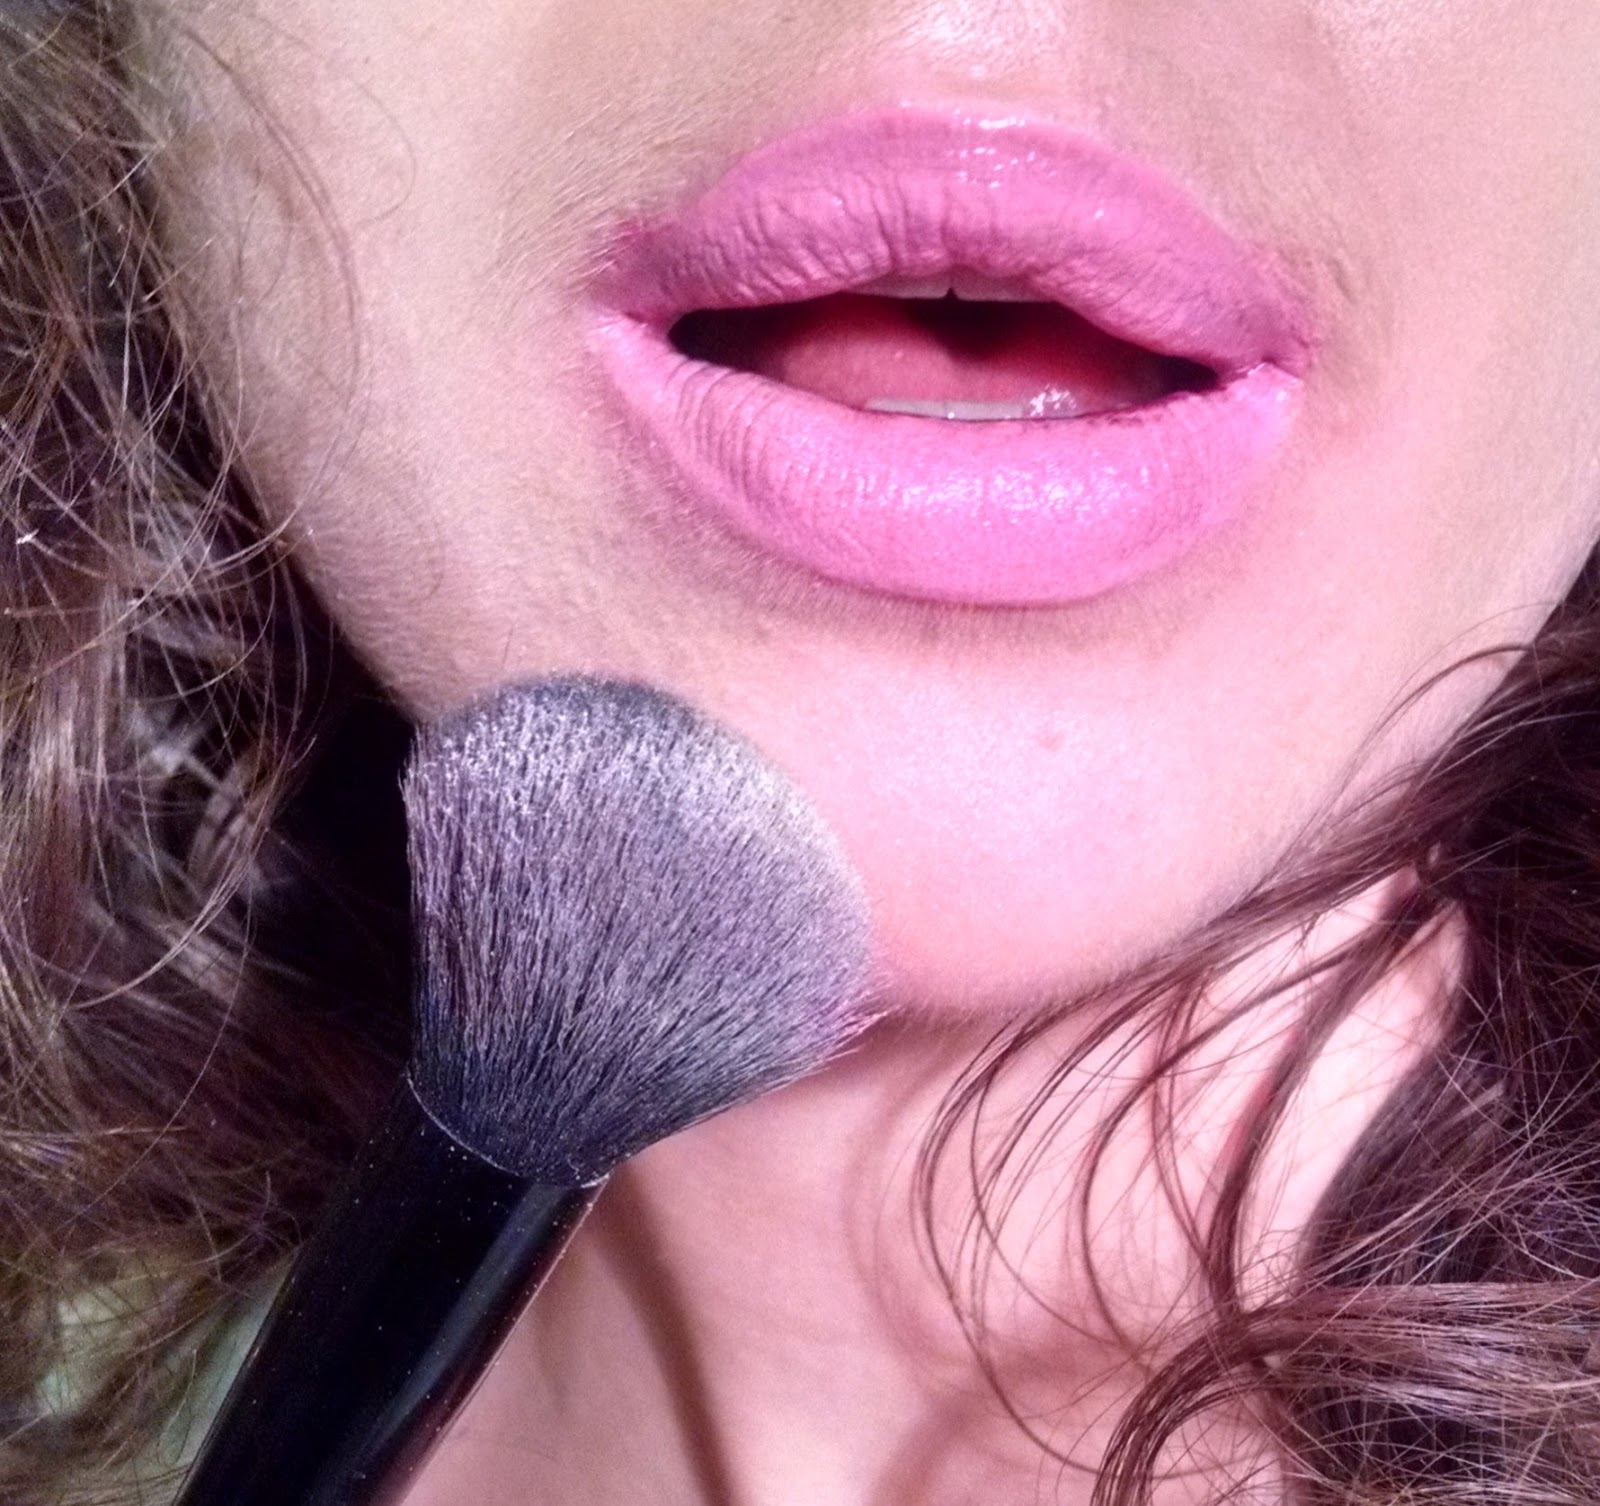
Make sure to apply your blush with an excellent brush.  I will explain this in further detail in another entry, because I don't think other people emphasize this enough, but it is truly easiest to apply blushes with a dense, soft, fairly large blush because it will blend the color into your skin a hell of a lot easier and cover more surface area, allowing for a quick application.  Of course you don't want to use that type of brush for the high-pigmented blushes.

Oh, look I yawned.  Don't wanna do that in front of people without covering your mouth!!  That's not Naturally Beautiful!!

On second thought, pose with your blush brush for a second.  Look at you, you're almost done!!  Being Naturally Beautiful took a lot of steps, know-how, and techniques, didn't it!?


Step 6:  Apply your mascara.  If you can get away with it, do NOT use a clumpy mascara.  People see clumps in your mascara and they run off saying, "YOU ARE NOT NATURALLY BEAUTIFUL!!!"  You can even wear some natural looking false eyelashes (Revlon Precision lash glue is supposed to be a good glue), I won't tell anybody.  And dear GOD, comb out the clumps!  But don't comb it too thoroughly, if your lashes are not tangled a little bit, that might look too unnatural!!


Step 7:  Now, pick out your lip product.  I know what you're thinking here.  Hey, that nude-colored lipstick doesn't look too bad!!  WRONG.  You want to have color on your lips, but if they look completely covered in lipstick, that won't be Natural Looking enough.  And if you choose the red one, you're screwed.


You know how to put on lipgloss.  Voila.


Step 8:  Oh, didn't anybody tell you that your eyelids by themselves are too veiny?  Well here, I just handed you that gem without you even asking.  Now apply some nude colored eyeshadow (whatever color you may be).


Make sure to blend it in really well with your finger.  Lord knows if it looks too powdery what will be going through the minds of those Wise People all around you.


Step 9:  Lovingly gaze at the pile of products you used to accomplish this Natural Look.  You're done mother*cker!


In some lightings, you'll SUPER-won't-look-like-you-did-your-makeup!

Knowledge is power baby, knowledge is power.

In fact, the more casual you act and the less you look like you give a shit, the more Naturally Beautiful the Wise People around you tend to think you are.


BOOM!  And done!!


Product List (GAH, I hate writing this part.):
*Burt's Bees Intense Hydration Night Cream With Clary Sage
*Hawaiian Tropic Silk Hydration Face Oil Free Lotion Sunscreen
*Dr. Brandt Pores No More (I plead with you not to buy this)
*Glamoflauge Concealer in the shade Ultra Light
*Real Techniques Complexion Sponge
*Elf Mineral Booster in the shade Shimmer
*Elf Stipple Brush (it's the large one but they don't name it large...hence my writing it that way)
*Elf Mineral Pressed Blush in the shade Wanderlust
*Bestope Premium Synthetic Kabuki Brush (the rounded one.  This was shipped from China and I am kind of ashamed of buying it)
*Elf Eye Enhancing Mascara
*Elf Conditioning Lip Balm in the shade (what a surprise) Nice & Natural
*Elf Essential Brow Comb and Brush
*Mary Kay Mineral Eye Color in the shade Silky Caramel (not sure they sell this shade anymore, but there are many similar shades in the line if you're looking to buy the exact same brand I used...it's pretty pricey and I bought it at a weak moment in my sophomore year of college.)

Total Number of Products Used To Achieve Naturally Beautiful Look: 13
Sarcasm Scale: 100%
I Didn't Give A Shit Level: Off The Charts
Percentage of Dumbassery That Prompted Me To Write This Entry: 100%


PS: No, I'm not an egotist, I don't think I'm amazing looking, and I didn't write this to show-off... Saying How To Be Naturally Beautiful was all in good fun and in sarcasm and I felt the need to write this PS in case anyone for some reason felt strongly otherwise.

Saturday, September 13, 2014

Earthy Barbie Makeup Tutorial :)

A couple days ago, I decided to do a makeup look that I call, “Earthy Barbie.”
 
Because let’s face it…Barbie may have been ALMOST perfect, but one thing was missing...


Ain’t one barbie that was ever played with had perfect hair.


I wanted to do something different from your typical dolly-look—something that popped somehow and created an edge, but brought the dolly-look down to earth in a way, so you’d have the girly cutesyness, but you’d also have something that kept barbie a bit real, a bit more rugged and up-front, whilst still upholding that girly-girl component. I LOVE contrast, I don’t usually like to do looks that are solidly based on one theme. It’s more fun to bring something new to the table that’s equally as exciting or moreso!! (or boring, if you don’t like makeup…in that case, get out of here!!! Haha just kidding…).

In this look, I did a smokey eye with some neutral tones, a bright pink lip, and of course, pink blush.  To open the eyes, I did not use any eyeliner.  Feel like you've got it?  Then unless you like seeing me embarrass myself trying to put my makeup on, you can feel free to be done reading!!!


(goofing around, trying to act like how I think a Barbie would act for the sake of this blog post :P  What I do for you people...HAHA just kidding.  It was actually pretty fun!!)

If you like the look, read on for the tutorial!! (or just to see me goofily try to put my makeup on :P ).  I personally would wear this makeup look...well, anywhere!

If you want a hair tutorial..... Here's the concensus of what I do:
Twist hair into a bun, wear in bun all day.  Take bun out, hair is curly and messy.  Shake it around, keep changing the part, don't brush it much and mess it up as much as possible (this will vary amongst hair types...with my hair, it takes little to no effort to mess up).
(FYI, this is not a hair blog.)


Step 1

(Read this whole paragraph before starting if you have sparse lashes and don't like false eyelashes!!).  First, put on your mascara.  The reason I think you should do this first is because you won't be putting any eyeliner on, so your eyeliner/eyeliner brush isn't going to mess up/tangle the lashes--and since that's out of the way, mascara fall-out can really mess up your foundation, as I'm sure you know.  Putting on mascara first eliminates the problem of cleaning up those black dots and ruining your foundation! :)  Got sparse lashes?  NO problem, apply some false eyelashes...If you have no false eyelashes (or just don't like them), you can use a thin layer of eyeliner, right at the base of your lashes before you put on the mascara, to at least give you some volume to compensate for the length!  Dolly-looks typically involve long eyelashes, but do whatever you are comfortable with.

Step 2

Put on a clean, freshly foundationed, concealed, set with powder, face.  I won't show you how I put on my foundation in this tutorial, as I think it's kind of boring to mention here and I'd like to elaborate more on my face routine when I do, and also, I don't like my current foundation (I use Revlon Colorstay 24 Hour in Ivory) and am in the process of switching.

Step 3

Now that THAT'S out of the way, it's time to get down to BIDNESS... YAY.
I decided to do the lips first :)  (A Little Note:  You can do your eyes first also.  I like to do eyes before blush because I think your blush brush and your blush can wipe away and cover any fall-out that may have occurred.  You could also do the eyes at the same time as you do the mascara (before foundation), eliminating any chance of fall-out ruining your makeup--I just did them after my foundation here as I already had my makeup on because it was the end of the day!!!)

Here you can see that I have my mascara and foundation on...and then my lips are quite stained from lipstain!!  I already tried scrubbing it off to no avail, but since I'd tried 3 different lipstains that day (different blog post), no dice!!!  So here is what I'm going to do.

Since I didn't have the shade of lipstick I wanted (a light, baby pink), and my lips were also stained, I opted to do the mixing option.  If you've already got a color that works for you and don't like messing around, then just put it on and skip this step!!!

First, get out concealer or white eyeliner.  If you are using white eyeliner, you need to put on a thicker layer for a lighter color now, because it's hard to go back and add white eyeliner after you've already applied lipstick.  I ended up using Glamoflauge concealer in the shade Ultra Light.  You can purchase it at Walmart for around 7 bucks.  Conceal a thin layer all over lips, till they are somewhat of a blanker canvas.
Alrighty, now that that is done, just add your lipstick/lip gloss.  I chose a random deep pink gloss that I am totally not recommending to you because it's a balmstain that stained my lips cherry red when I took the concealer off, but anyway, at the surface level the concealer lightened it to a baby pink :)  Add any translucent powder to set the color, then blot.  You could also use baby powder. :)

Step 4

Eyes.  This is actually pretty simple.  I only used three colors!!  I used a palette that was discontinued from ELF, but these are pretty general shades, so feel free to use whatever and experiment.  I think that the NYX Love In Paris eyeshadow palettes in Pardon My French and C'est La Vie would work well :)  There are SO many neutral palettes out there, all you need is a matte brown, an emerald green, and any highlight ranging from beige to gold (ooh, that could be really pretty with this) to white and you are good to go.


The shades I used are:
A deep emerald green with just a little sheen to it.
A matte yellow-toned poop brown with a small amount of gold glitter (what?  I don't know what else to call the shade...It is pretty though.  Heh heh :) ).
A pearly beige.
The matte brown defines the eye and creates some definition (since using all shimmer colors can take away from definition), the darkness of the emerald contours and brightens your eye-color, and the pearly beige highlights and brightens your eye.  You can interchange these three colors with other tones, but that was the logic for the shades I chose :)

1.  Cover the entire lid of the eye with the matte brown, from corner to corner, blending out into the brow-bone but not allowing the color to enter the brow-bone.  Put it on the inner corners of your eyes.  Line directly underneath the eye on the inner and outer corners like you would an eyeliner, making sure to blend out, but do not line underneath the middle of the eye.

(I promise my eyebrows don't look this messy in person...But if they did, SO WHAT :P )
2.  Take the emerald shade and put it on the outer corners of your eyes, blending into the lid and traveling the color into your crease.  Line the bottom center of your lid with the color, like you would an eyeliner, blending out into where you lined the eye with the matte-brown on each side.

3.  Take the pearly shade and put it all over the brow-bone, traveling to the the spot right around the inner-corners of the eyes where you put the matte brown.

Eyes are done. :)

Step 5

Now you just apply a baby pink blush to the apples of your cheeks, blending out across your cheekbones, to create that dolly-look.  Apply it pretty high up on the cheeks, I like to get it almost right under my eyes.  If you apply too low it can age you.  I also like to put a little blush on the tip of my nose for a little glow, but you don't have to do that!


And you are done!! :)  Shine on, Miss!!


(A real barbie has some JANKED UP hair!!!!!!!  We all know it.)


Hope that was fun!!  I understand it might not be for everyone, but for anyone girly and daring, I think it's a really fun, pretty way to express yourself!!  Of course HAHA, you do NOT have to go out in public with a messy, crazy mop of hair :)  I did that for the sake of the blog post, but I think messy in a pretty way would be cute with this look.  And not that I conform to seasonal makeup in the least, but it could also be a great Fall to Summer look!!  Most of all, I hope any tips I shared helped somebody!!  Or you at least laughed a little.  Take care!! :)

Thursday, September 11, 2014

NYC Liquid Eyeliner Review and My Eyeliner Story :)

Firstly, I must address this, I apologize it's been so long since my last post (roughly 2 or 3 weeks?).  I find that these makeup blog entries can often take a little bit longer and require more work than the entries of my other blog, Thoughts and Makeup, which is just my own thoughts spouted out!  Give me time, I'm finding my feet, but I have tons of entry ideas in store that I can't wait to share with you!


(NYC Liquid Eyeliner)


I have had times in my life where I utterly and completely struggled with makeup.  I remember my first couple years of college were especially rough in the eyeliner department… I would use old Jordana and NYC pencil eyeliners from high school.  They would melt off my face throughout the day, so every couple of hours, I was running to the bathroom to do touchups (luckily I only wore a little undereye concealer, the eyeliner, and some decent mascara, but it was still a nightmare).  I didn’t know about primer, and I had very few tricks up my sleeve.  I don’t know why it never occurred to me that better formulas were out there—in my head, they simply didn’t exist.  I chocked it down to the fact that everyone must have been doing what I was doing, and I was just failing at keeping up with it quickly enough!!  Luckily, in addition to having some good tricks, I’ve overcome that naiveté and I can share with you something cheap that actually WORKS—and phenomenally, dare I say it.

I had avoided this brand like the plague for some years after my horrible experiences with their eyeliner and other unmentionables that would melt off my face.  But I am a believer in following advice from professionals—via Youtube—and so when I saw a makeup artist I really respect, Chrisspy, using the NYC Liquid Eyeliner, and not only that, but saying it was her, “favorite,” let’s just say I hopped over to the nearest NYC-selling location (unfortunately for my wallet, not very far away--fortunately for my wallet, it’s NYC!).
(wearing NYC Liquid Eyeliner)
I’ve been in the market for a GOOD liquid eyeliner for a while now.  I’ve been sticking to gel pots of eyeliner (Stila was my first, which I bought for 20 dollars, until I found ELF’s version, which was the same exact thing for 3), because in the beginning of this fascination with makeup, what little research I’d done had pointed to that gel pots of eyeliner had that majestic staying power that College Lyza wanted so desperately and did not have (and gel pot eyeliners work great by the way—last ALL day, even when they get wet, and they come in intense black shades, though not as deeply pigmented as liquid liners).

Until present, I have also been using some mediocre liquid liners—and in a way they work for me, because I like to layer them over pencil eyeliner to define and intensify the color—and also to bump up the staying power.  I did that in my About Me picture on the right side of the page using a Milani pencil eyeliner and ELF liquid liner in midnight (the elf doesn’t have great staying power at all, until you enter in a good black pencil).  It works.  Cleans up the look and greatly turns up the staying power.

But, I never dreamed something so cheap would prove to work well on it’s own.

(wearing NYC Liquid Eyeliner)
First of all, let me just say this stuff is the blackest eyeliner I have ever owned, and I have always wanted a highly intensified, pigmented, black-hole black eyeliner, because the deepest shade of black intensifies every look more than any other shade could (just be careful with it!).  I just adore the intensity of this.  It’s wonderful.

It also dries extremely fast, without being so fast that there’s no room to fix errors…In less than a minute, it is completely dry.  The tip of the brush is pointed, but is thick enough to where you can line your eye without having to constantly draw back to create a thicker line (I recommend using the tip of the point to line the middle of your eye to remove some of the product, then going back over after the point is somewhat dryer to create the wing, that way there’s more room for error and you can more easily create a cleaner, pointed wing).  And the staying power is incredible.  It lasts, lasts, and lasts without fading!  I am hooked!

And some swatches on my arm actually lasted without changing or smearing all night long.  Although, I noticed that the thinner swatch of eyeliner, where I barely applied much product but still got a solid line, faded though, so use a thicker layer on your eyes (two coats is safe for me).

(NYC Liquid Eyeliner swatches)
Consensus of Pros:  I purchased this for $2.50 with a buy one get one free coupon (I also got the NYC Smooth Skin Translucent powder—I wish they’d just call it what it is—PALE!!  Someone   The eyeliner is a definite winner in terms of price, staying power (just don’t get it wet—read more below), intensity, and ease of use.  I do recommend not using a thin layer of it—use a thicker layer (two coats, or one thick coat is good) to have the all-day staying power.  You could also try layering a line of black eyeshadow or  a good black eyepencil (I like Milani’s) underneath it as well to change the look, intensity, and staying power, but be warned that experimentation does not always lead to good results : )
with darker skin couldn’t pull it off unless they were using it as a highlighter).

Consensus of Cons: Okay, there is one con that I haven’t mentioned yet, and it’s pretty important.  This eyeliner is in NO way, shape, or form waterproof.  Don’t even touch it with water!!!  This could be a great thing for someone who hates taking their makeup off at the end of the day and would like to remove it quickly.  However, for someone like me, who constantly has to put eyedrops in, this could make things a little precarious.  So I won’t be putting this on my under eyes.  Don’t wear this in the rain without an umbrella, don’t wear this if you think there’s a chance you may cry that day—DON’T.  Stick to gel pots if you have those concerns!!  I still love this eyeliner because of the amazing pigmentation and the staying power.  I can wear it from morning till night and it will not budge or fade in the slightest, and I do have combination skin with oily eyelids.

Because of the water concern, I give this a 4/5.  Still fabulous stuff though, and I haven’t been having problems with it, even with my eyedrops.  I hope it works as well for you as it does for me.

Because of gel pot eyeliners and some other eyeliners with fantastic formulas, like this one, my eyeliner woes are completely over :)  When you want something a lot, never settle for something that doesn’t work for you!!  At least give yourself a chance to look around and do some research first, no matter how silly or small you think it is!  You should be using makeup that you can rely on, otherwise you shouldn't bother using it at all.

And when in doubt, stick to gel pots!! (Some dependable, affordable, and pigmented ones are ELF Studio Cream Liner, ELF Essential Smudge Pot, Essence Gel Eyeliner, and Wet N Wild Mega Eyes Creme Eyeliner. All of the expensive ones perform exactly the same as the ones I just listed, so I am not going to bother mentioning them!!)  

Take care and have a fabulous day!